In this article we will learn how to create a database in snowflake portal,creating a table and how to insert multiple rows of data into the table from snowflake portal.Here are few steps to insert data into the tables.
Step 1: Login to the Account
There are two different ways to login to the snowflake account:
- With the dedicated URL which is sent to the mail<
- Visit app.snowflake.com

Enter Username and password and click on Sign in
Step-2: Create a Database in Snowflake using Portal
After successful login it will navigate to the Snowflake Portal page
- Click on the “Data>>Databases”tab at the portal’s top.
- Then click on “Create” button to create a snowflake Database.
- It will ask you to provide the Database name and Comment as an optional field.
- Provide Database name in name text box then click on create
- Database name will be created and it is listed in Databases with created on,created by and source details.

Note: No need to create a schema in the database because each database created in Snowflake contains a default schema which is “Public”.
Step-3: Create a table in snowflake using Create statement
- Here we are going to create a table using the create statement.It creates a new table in the specified schema
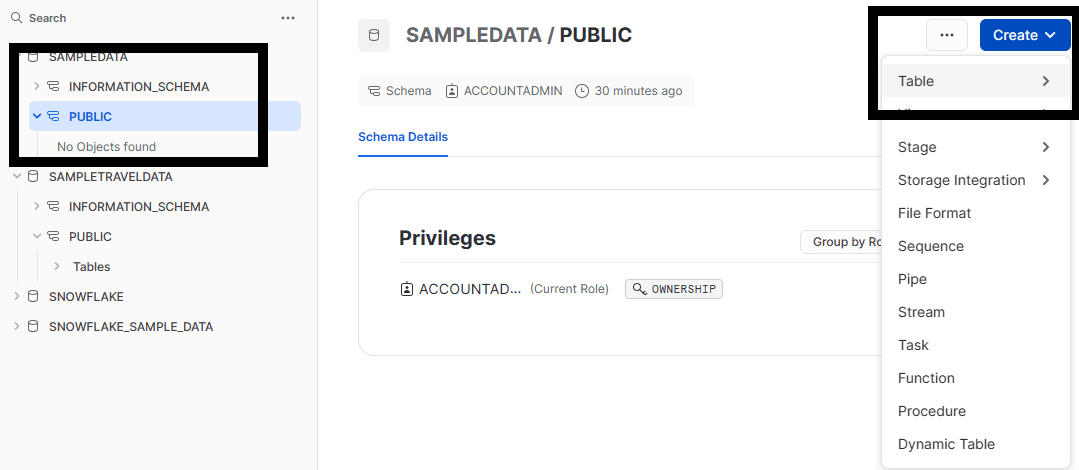
- Expand created Database and then expand default schema Public.
- On left side top of portal page there is create dropdown select table as shown in above fig.
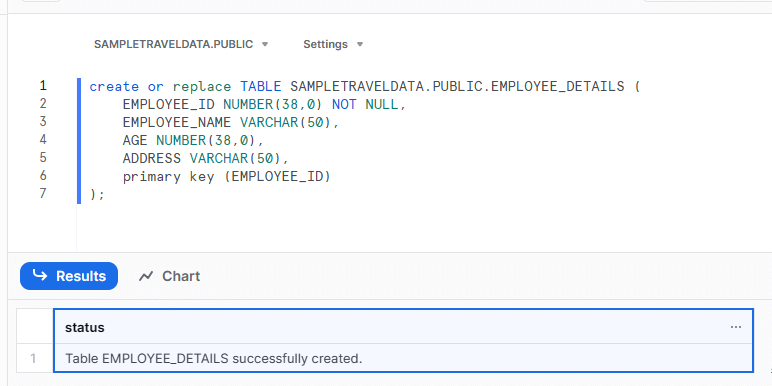
- By default ,worksheet is opened,Use the following query to create a table and columns under the database SAMPLETRAVELDATA and PUBLIC schema.
CREATE TABLE IF NOT EXISTS employee_details (
employee_id int NOT NULL,
employee_name varchar(50) DEFAULT NULL,
age int DEFAULT NULL,
address varchar(50) DEFAULT NULL,
PRIMARY KEY (employee_id)
)
Step-4: Insert data into the table in Snowflake using Insert command
- In snowflake,data insertion is performed to insert data into a newly created table or existing table.By specifying the values,we can insert the data into tables.
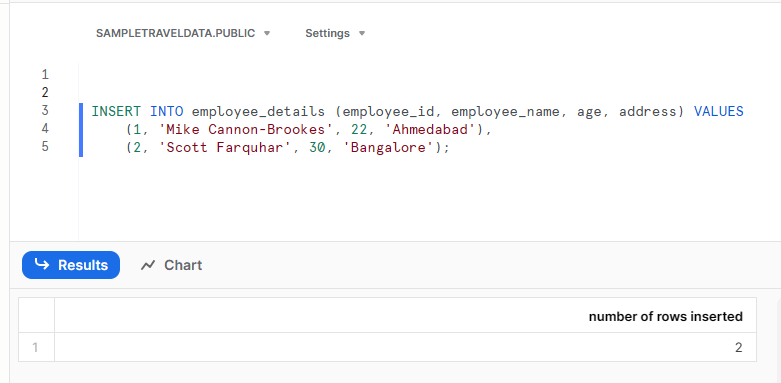
- Here we can insert multiple rows in one INSERT Statement by having multiple set of values into the table .
Example: INSERT INTO employee_details (employee_id, employee_name, age, address) VALUES
	(1, 'Mike Cannon-Brookes', 22, 'Ahmedabad'),
	(2, 'Scott Farquhar', 30, 'Bangalore');
Step-5: Verify the data in the table in Snowflake
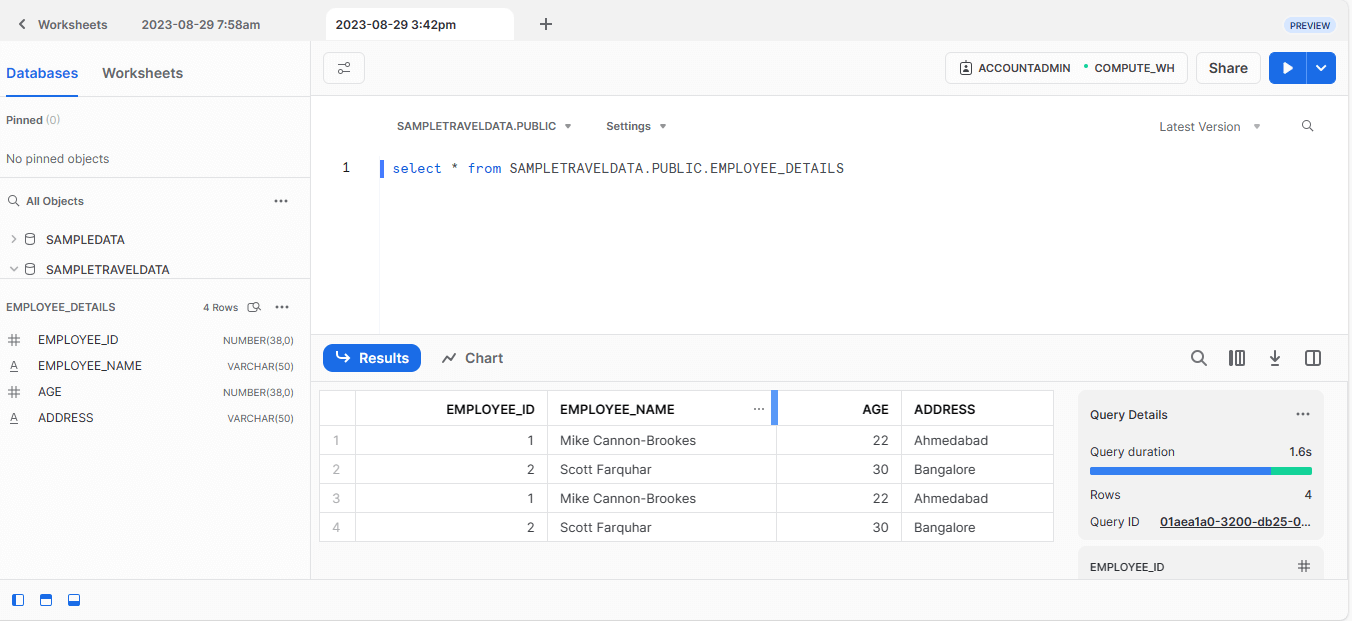
Here we will verify the inserted row in the table using select statement as shown below
Syntax: select * from DATABASE_NAME.SCHEMA_NAME.TABLE_NAME.
Conclusion:
As snowflake is data storage and process platform,hence data insertion is an essential process.We hope this blog will provide you with the necessary knowledge on creation of database,tables and on data insertion through snowflake portal.
Thank You
B. Nikhila
Helical IT Solutions

Best Open Source Business Intelligence Software Helical Insight is Here