What is RLS in Power BI?
With Power BI, row-level security (RLS) may be utilised to limit certain users’ access to certain types of data. You can construct filters within roles, and these restrict data access at the row level. Members of a workspace in the Power BI service have access to the datasets in the workspace. This data access is not constrained by RLS.
With Power BI Desktop, you may set up RLS for data models that have been loaded into Power BI. On datasets that make use of DirectQuery, such as SQL Server, you can additionally configure RLS. The model, not Power BI Desktop, is where Row-level security is configured for Analysis Services or Azure Analysis Services lives connections. For datasets with a live connection, the security option won’t be visible.
In Power BI Desktop, define roles and rules.
Within Power BI Desktop, roles and rules are possible to set. The job definitions are also published when you publish to Power BI.
These steps should be followed to define security roles.
Create a DirectQuery connection or import data into your Power BI Desktop report.
Note:It is important to note that you cannot set roles for Analysis Services live connections within Power BI Desktop. Within the Analysis Services model, you must accomplish that.
Go to Modelling tab, and select Manage Role.

Click on Manage roles and select Create.
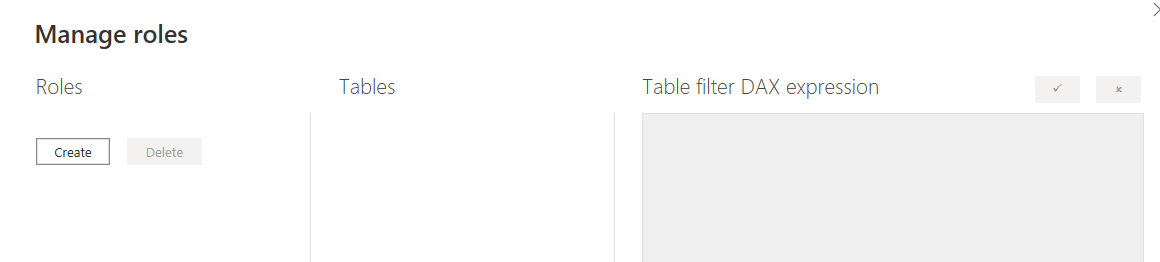
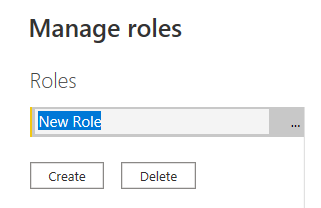
Give your desired name on the New Role
Note: You can’t define a role with a comma, for example India,APRole.
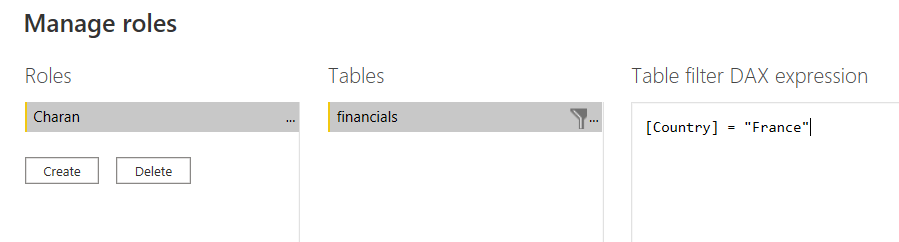
Under Tables, select the table to which you want to apply a DAX rule.
In the Table filter DAX expression box, enter the DAX expressions. This expression returns a value of true or false. For example: [Entity ID] = “Value”.
Note: You can also use username() inside this expression. Keep in mind that username() returns DOMAIN\username inside Power BI Desktop. Inside the Power BI service (and Power BI Report Server), it returns in the format of a user’s UPN (User Principal Name). If you want to return the user in the UPN format, you can useuserprincipalname() which always returns the UPN in the format of your user’s user principal name, such as username@contoso.com.
After you’ve created the DAX expression, select the checkmark above the expression box to validate the expression.
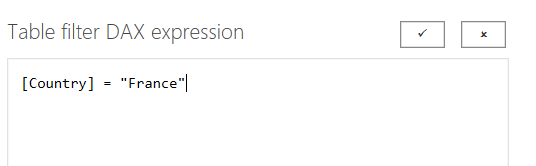
And then click on Save.
Users cannot be added to a role in Power BI Desktop. They are added to the Power BI service by you. By using the username() or userprincipalname() DAX methods and configuring the appropriate relationships, you may enable dynamic security in Power BI Desktop.
Whether the relationships are set to single-direction or bi-directional, row-level security filtering by default utilises single-directional filters. By choosing the relationship and selecting the Apply security filter in bothdirections checkbox, you can manually enable bi-directional cross-filtering with row-level security. It should be noted that you may only choose this option for one of a table’s many bi-directional relationships. When dynamic row-level security has also been enabled at the server level, use this option.where row-level security is based on username or login ID.
Validate the Roles Within Power BI Desktop
Test the outcomes of the roles in Power BI Desktop after you’ve created them.
Choose View as under Modelling from the tab.

The View as roles window appears, where you see the roles you’ve created.
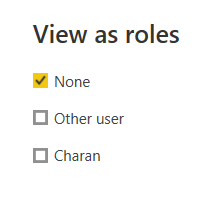
Select a role you created, and then select OK to apply that role. The report renders the data relevant to that role.
You can also select Other user and supply a given user.
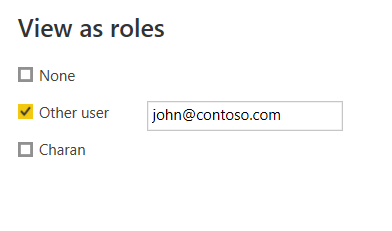
It’s best to include the User Principal Name (UPN) because the Power BI service and Power BI Report Server need it.
Only if you’re utilising dynamic security depending on your DAX expressions can Other user in Power BI Desktop provide different results.
Choose OK.
According on what that user can view, the report is generated.
You can now publish your report to the Power BI service after confirming the roles in Power BI Desktop.
Manage Security on your Model
To manage security on your data model, open the workspace where you saved your report in the Power BI service and do the following steps:
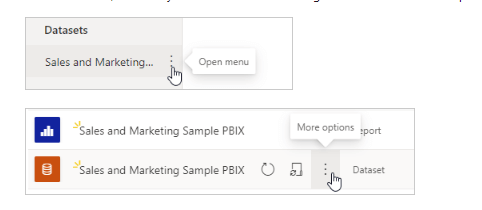
In the Power BI service, select the More options menu for a dataset. This menu appears when you hover over a dataset name, whether you select it from the navigation menu or the workspace page.
Click on Security.
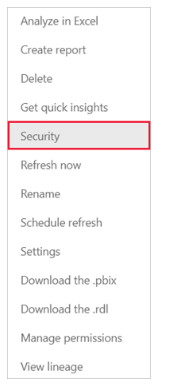
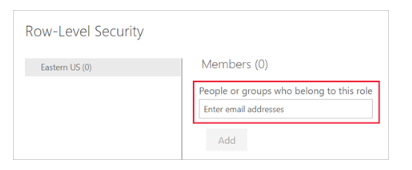
You can add members to a role you created in Power BI Desktop by clicking Security, which will take you to the Role-Level Security page. Contributors (and higher workspace roles) can add people to roles and see the Security section.
You can only create or modify roles within Power BI Desktop.
Working with Members
Add Members
In the Power BI service, you can add a member to the role by typing in the email address or name of the user or security group. You can’t add Groups created in Power BI. You can add members external to your organization.
You can use the following groups to set up row-level security.
• Distribution Group
• Mail-enabled Group
• Security Group
Note, however, that Office 365 groups are not supported and cannot be added to any roles.
Remove Members
You can remove members by selecting the X next to their name.
Validating the Role Within the Power BI Service
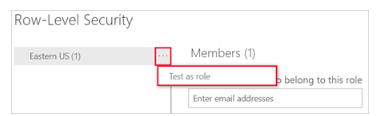
You can validate that the role you defined is working correctly in the Power BI service by testing the role.
1. Select More options (…) next to the role.
2. Select Test data as role.
Using the username() or userprincipalname() DAX function
You can take advantage of the DAX functions username() or userprincipalname() within your dataset. You can use them within expressions in Power BI Desktop. When you publish your model, it will be used within the Power BI service.
Within Power BI Desktop, username() will return a user in the format of DOMAIN\User, and userprincipalname() will return a user in the format of user@contoso.com.
Within the Power BI service, username() and userprincipalname() will both return the user’s User Principal Name (UPN). This looks similar to an email address.
Using RLS with Workspaces in Power BI
If you publish your Power BI Desktop report to a workspace in the Power BI service, the RLS roles are applied to members who are assigned to the Viewer role in the workspace.
Even if Viewers are given Build permissions to the dataset, RLS still applies. For example, if Viewers with Build permissions use Analyze in Excel, their view of the data will be protected by RLS.
Workspace members assigned Admin, Member, or Contributor have edit permission for the dataset and, therefore, RLS doesn’t apply to them. If you want RLS to apply to people in a workspace, you can only assign them the Viewer role.
Considerations and Limitations of RLS
The current limitations for row-level security on cloud models are as follows:
• If you previously defined roles and rules in the Power BI service, you must re-create them in Power BI Desktop.
• You can define RLS only on the datasets created with Power BI Desktop. If you want to enable RLS for datasets created with Excel, you must convert your files into Power BI Desktop (PBIX) files first.
• Service principals cannot be added to an RLS role. Accordingly, RLS won’t be applied for apps using a service principal as the final effective identity.
• Only Import and DirectQuery connections are supported. Live connections to Analysis Services are handled in the on-premises model.
• The Test as role/View as role feature doesn’t work for DirectQuery models with Single Sign-On (SSO) enabled.
Thank You
Charan Raj Karanam
Helical IT Solutions

Best Open Source Business Intelligence Software Helical Insight is Here