Working with AWS Athena and how we can analyze data stored in S3 using Athena. Athena is serverless, so there is no infrastructure to manage, and you pay only for the queries that you run in AWS Athena.Here we are going to store a file in a bucket in AWS S3 and then query the data using AWS Athena using the standard SQL syntax. In order to query data using the standard SQL syntax, we need to have some database where the queries can be executed against. Fortunately, we do not have to use any other services since, Athena offers this feature to support datastores like CSV, JSON, and some other columnar data formats such as Avro and Parquet. Due to this, it is much easier to start analyzing your S3 data much easily with Athena.
Storing data in S3 buckets
Now that we have some idea of what AWS Athena is all about, we can start by uploading a plain CSV file to S3bucket with the name “ad-athena-datasets”, create a new folder with the name “data” inside the bucket, and upload the file inside the folder.
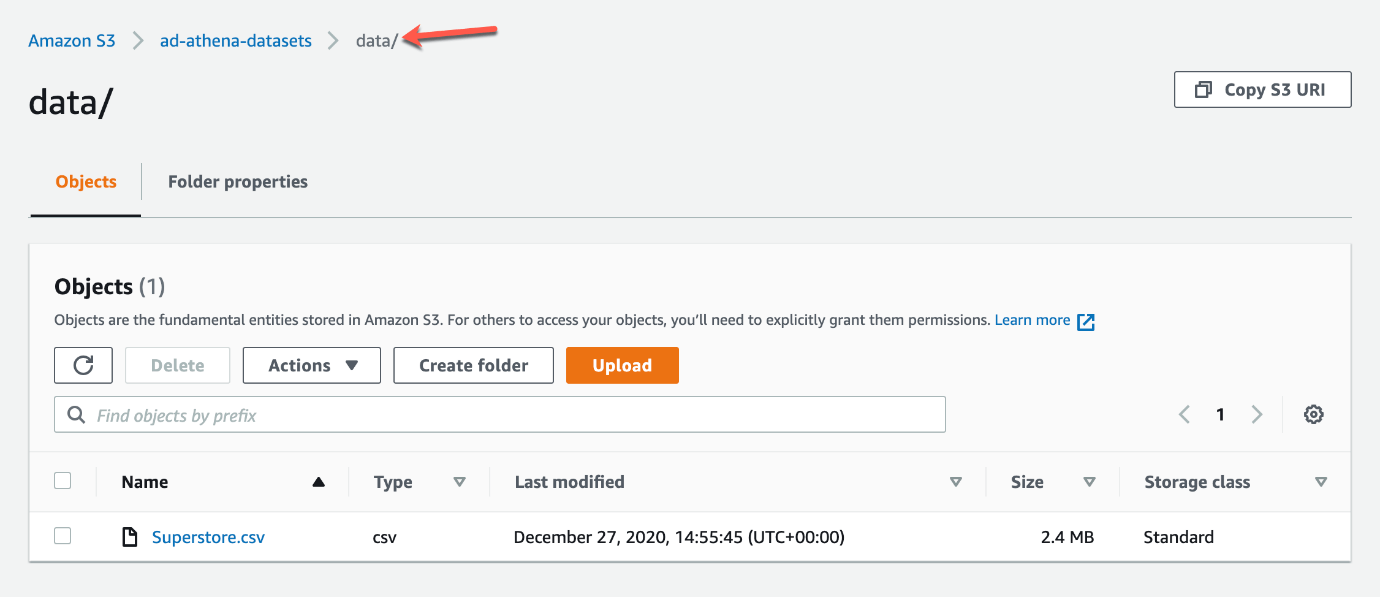
File uploaded to AWS S3
In addition to the above, we would also need a location within our S3 bucket to store the query results. For that, I am going to create a new folder with the name “query-results”.
Setting up the Athena environment
Now that our dataset is ready in S3, let us go ahead and set up the Athena environment to query the data store in the S3 bucket. For that, navigate to the Athena service in AWS and click on Create Table to create a new table that can represent the data stored in the S3 bucket. Since our data resides within S3, select the option “from S3 bucket data” in the dropdown menu.
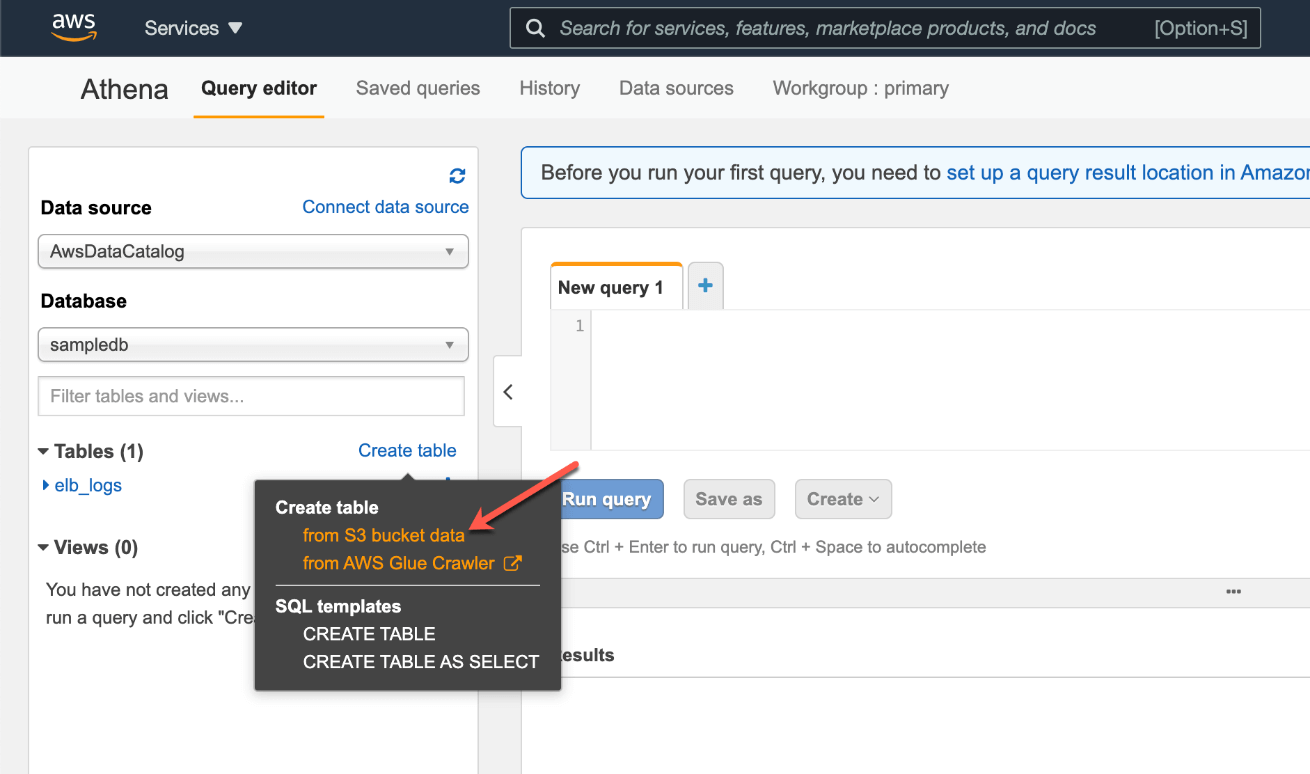
Creating a new table in AWS Athena
On the next page, you need to provide some relevant information regarding Athena and your S3 data. You need to specify the name of the database in the first box. If you do not have already created any database earlier, you can create a new one by providing a valid database name here. If you have already created a database before, you can simply use that database for the purpose of this exercise.
The next is to give a suitable name to the table that you are going to query using Athena. Usually, I like to keep the name of the table similar to that of the name of the file in the S3 bucket. This makes me easier to understand which file is this referring to. Since the name of the file in the S3 in “superstore.csv“, I am going to name the table as “superstore“.
Finally, we need to provide the location of the data file that we are going to query using Athena. This is the S3 URI of the folder under which your files are placed. An important point to note here is that we are not supposed to provide the ARN of the file. Instead, we should provide the location of the next higher-level directory in which the file resides. In our example, the file resides in the bucket “ad-athena-datasets“, under the directory “data“. So the location that is to be provided here is “s3://ad-athena-datasets/data/“. Click on Next once done.
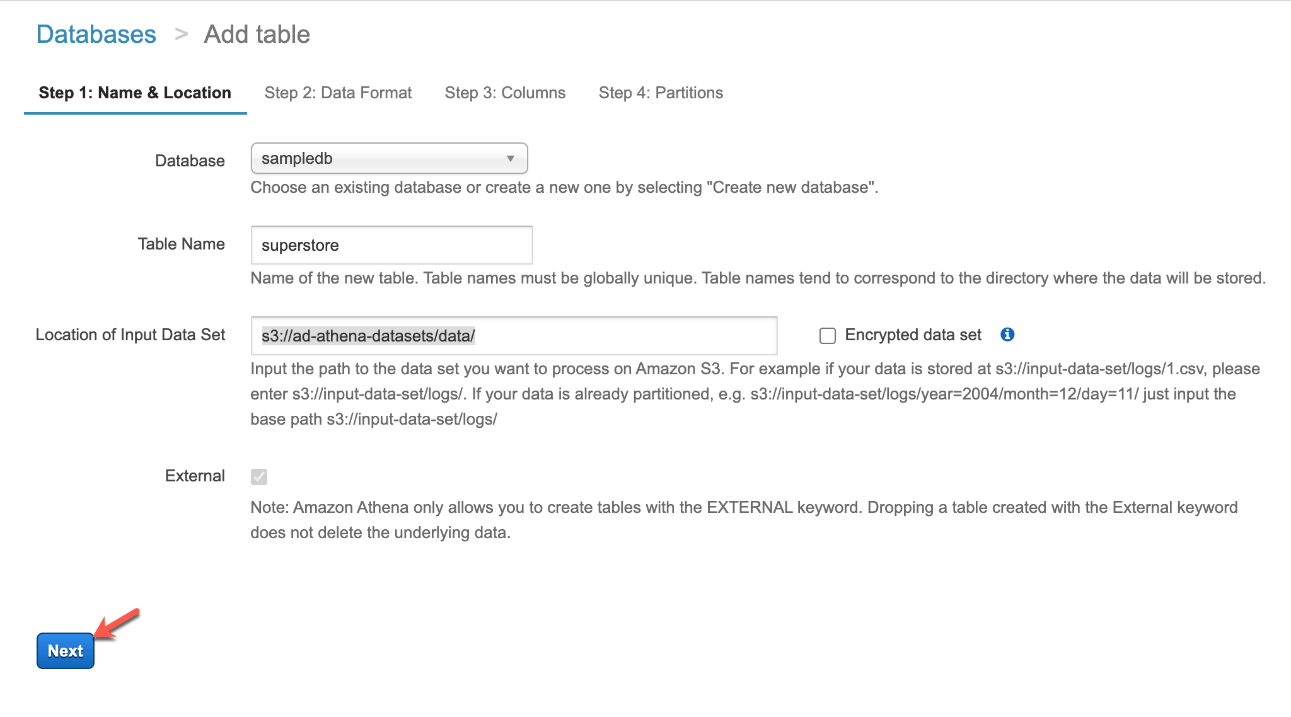
Adding a table in AWS Athena
On the next page, select the type of file that we are going to work with. Since it is a CSV file, simply select CSV from the options and click on Next.
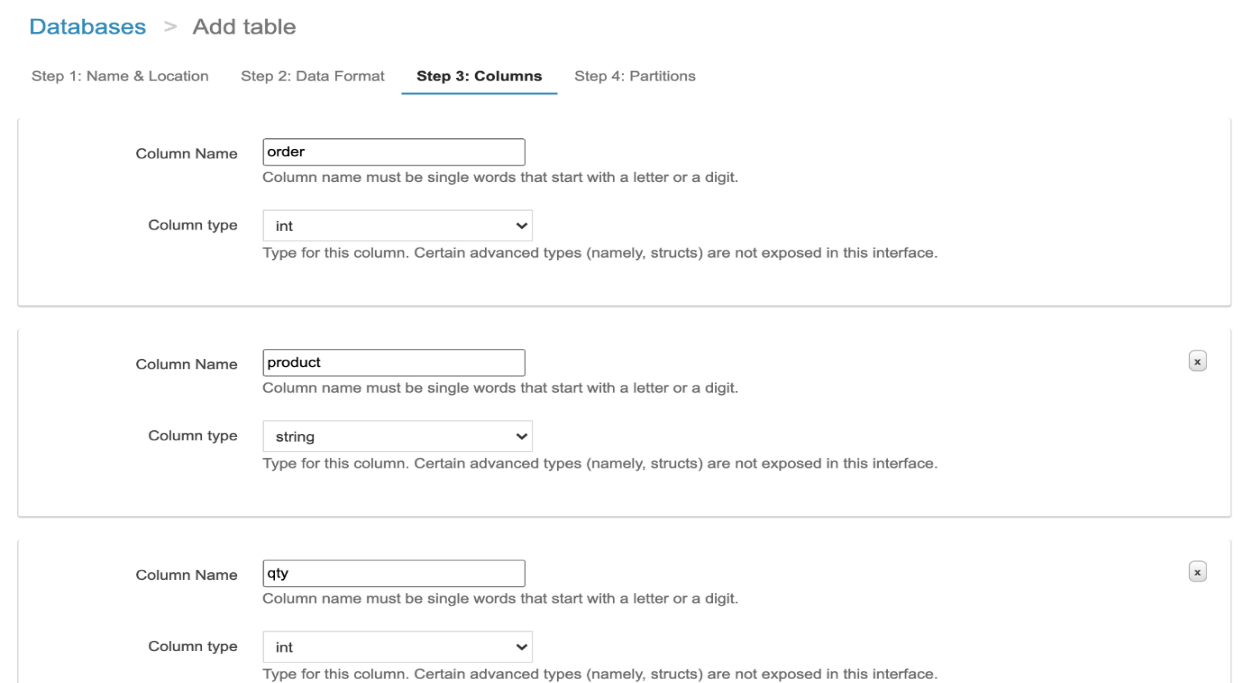
On the next page, we need to define the name of the columns in the dataset and the datatypes associated with those. Since our dataset is fairly simple, by specifying the name and the datatypes manually. Specifying the appropriate datatypes in this part is extremely important otherwise there might be some errors while executing the queries against the dataset.
Specifying column names and datatypes for the dataset
There is also an option to bulk add all the columns in case you have a relatively wider dataset that has many columns in it. In that case, you can click on Add Bulk and then provide the name of the column and the datatype in a key-value pair as follows.
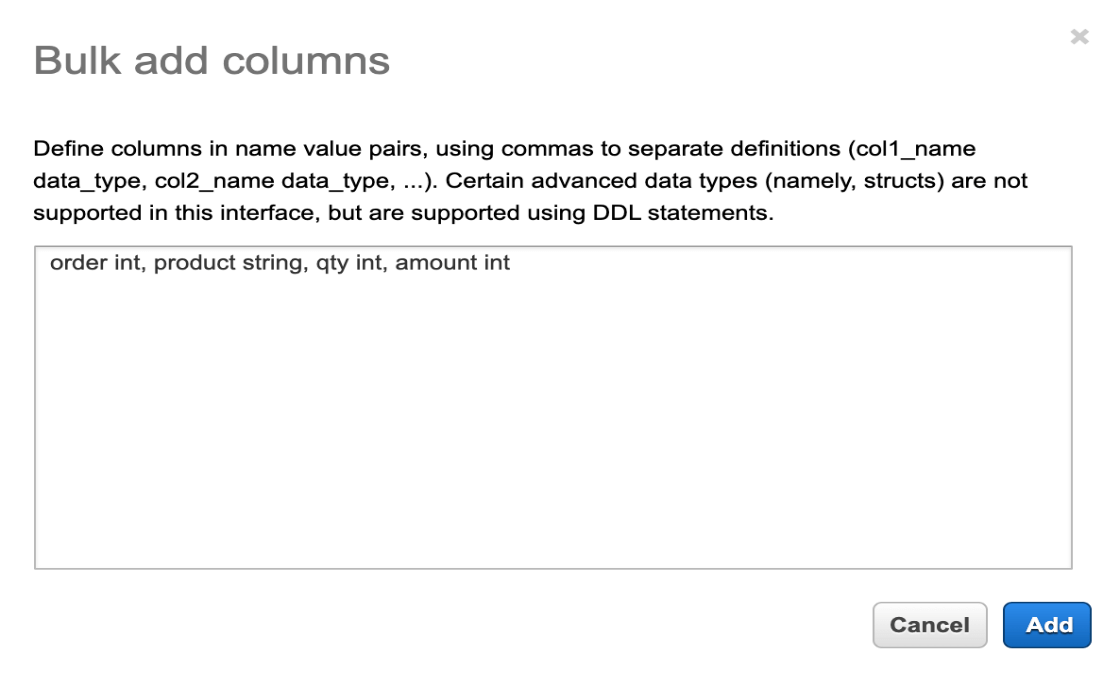
Defining Bulk Column in AWS Athena
On the next page, we need to define partitions. For the sake of simplicity, we are not using any sort of partitions on our dataset since it is quite small. However, when you have humongous datasets, you can partition those by days, months, years and so on. Once you are done with these, click on Create Table. You will notice that a new query window appears which generates a script to create a new external table in AWS Athena. Click on Run Query to execute the script and create the table.
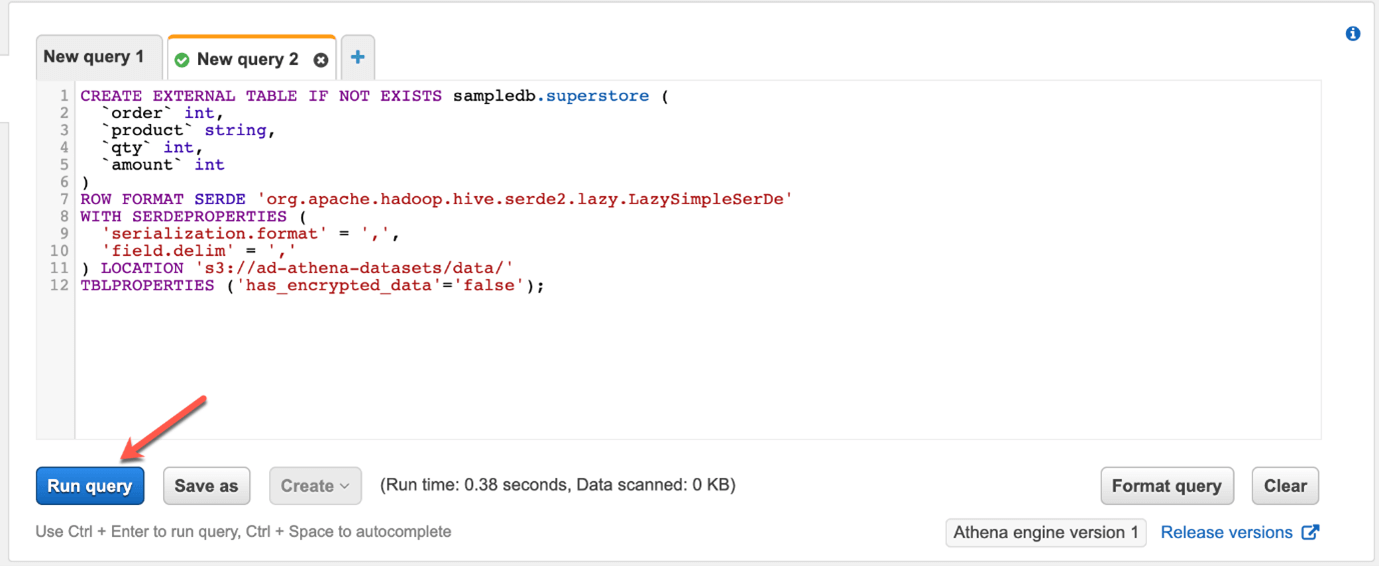
Create table script generated by Athena
You can see that the query has run successfully and a new table with the name “superstore” has been created in the Athena console.
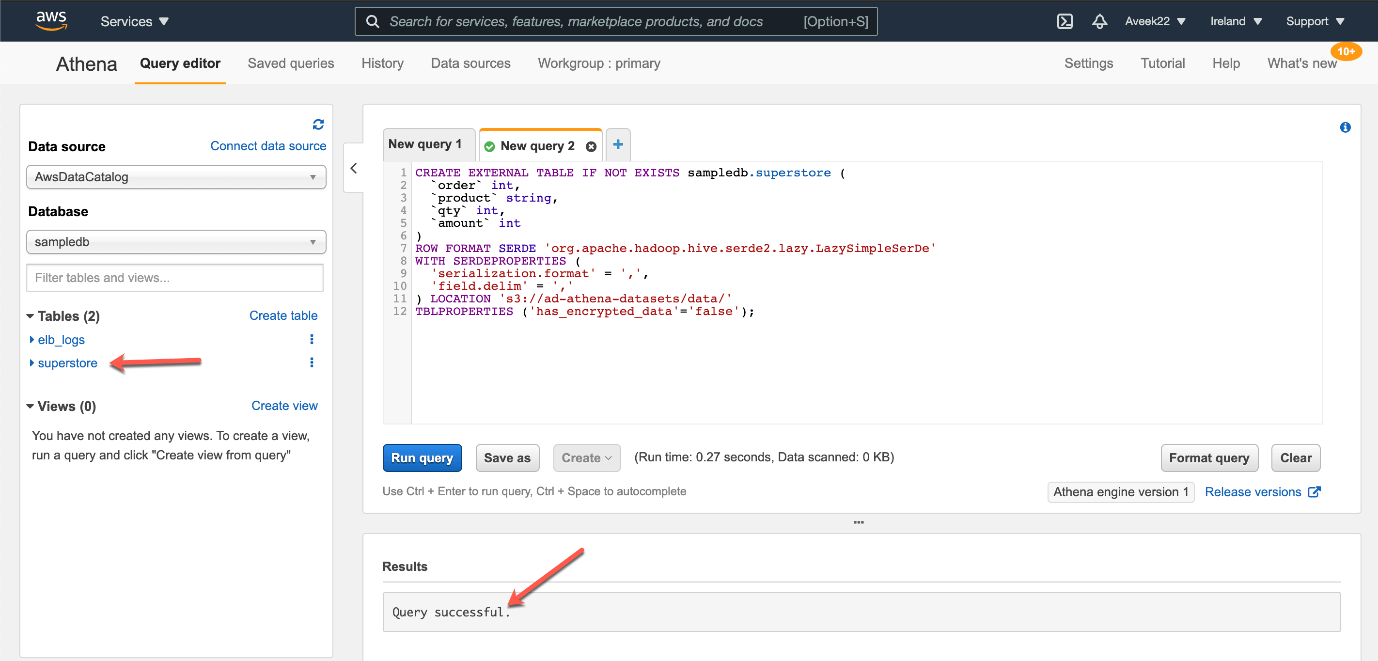
Query execution successful and new table created
Querying the external table in AWS Athena
Now that we have created our external table in Athena, we can query the table by using standard SQL scripts. Navigate to the query window and write a simple SQL script to fetch all the records from the superstore table. You can see the results in the query window below.
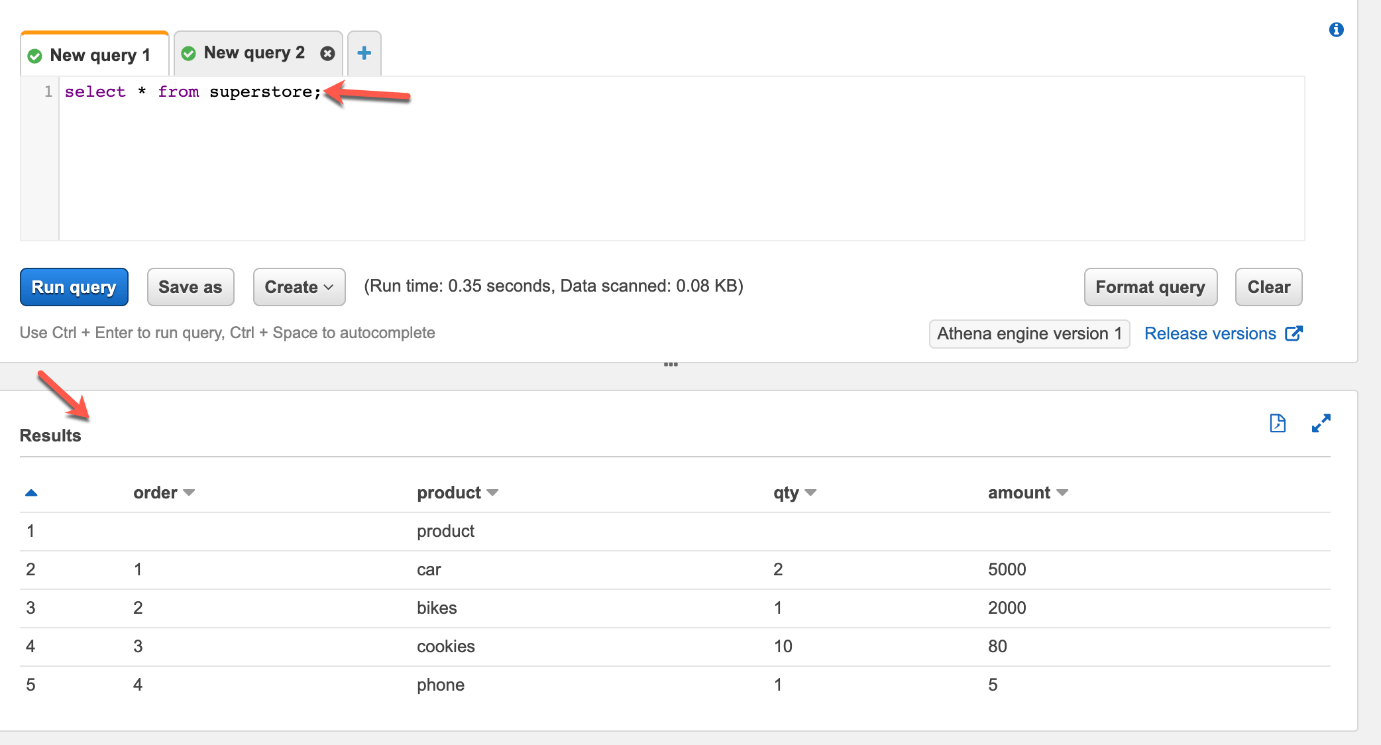
Reading data from S3 using Athena
As you can see, we have successfully queried the external table in Athena and the results were returned from the CSV file stored in S3. This is a very simple example and does not involve any complexities. However, in a proper business, it is possible that there will be a lot more files in the same folder and with different data qualities. AWS Athena provides a simple interface to query all such data in S3 by using a native SQL syntax which is very simple and useful.
Thank You
Prashanth Kanna
Helical IT Solutions

Best Open Source Business Intelligence Software Helical Insight is Here