Installation of Talend Cloud
- Unzip the Talend archive file downloaded.
- Launch the Talend Studio by double clicking the executable file and accepting the terms of license agreement.
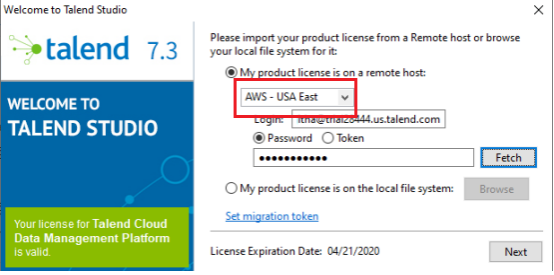
- On launching the studio, Select the server URL based on the region to fetch the license from Talend Management Console.
- Provide the Login name and password and click on Fetch.
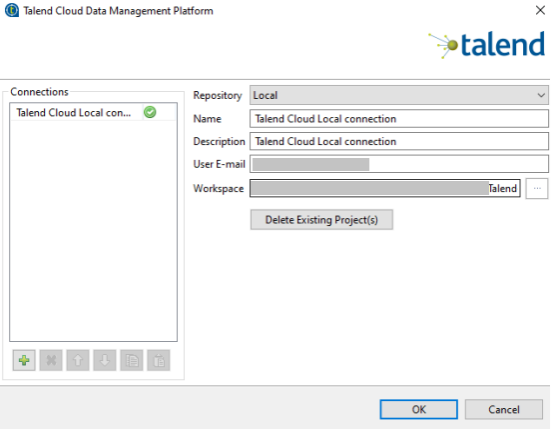
- Click on manage connections and create a connection.
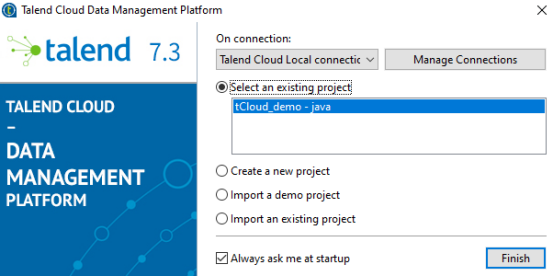
- Create a new project(Eg : tCloud_demo) and click finish.
Example : Creating a local connection by selecting the Repository as Local, appropriate name, description, Email and Workspace and click OK.
Connecting Talend Studio to Talend Cloud
The jobs developed in Talend Studio can be published to cloud right away.
Step 1 : In the studio menu click Windows>Preferences
Step 2 : Select Talend>Talend Cloud
Step 3 : Select the authentication mode as Login and Password or Access
Token(Login and password in this example) and click on Test Connection to check if it is accessible.
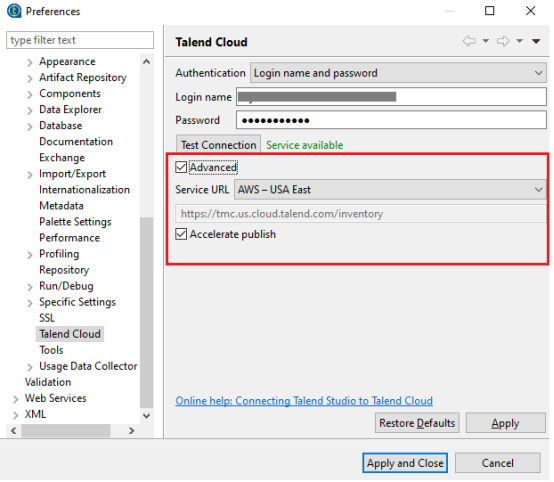
Note : By default Accelerate publish check box is enable in Advanced.
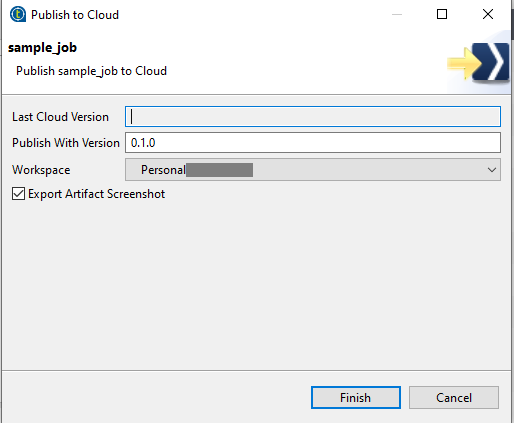
Step 4 : Publish job to cloud
Right click on the job and select publish to cloud to publish the job to Talend Cloud.

Step 5 : Select the workspace an click on Finish.

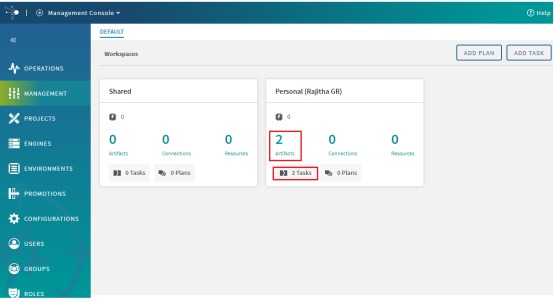
- To check the job that was published to cloud from the studio, click on MANAGEMENT in management console. The jobs published can be seen as Artifacts and jobs that got executed can be seen as Tasks
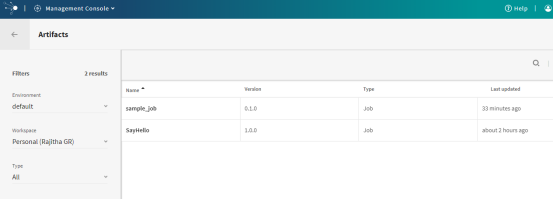
- Click on Artifacts to check if the job got published into the cloud.
- As we can see, there are two Artifacts in the console. sample_job that got published from the Talend Studio
Thanks
G R Rajitha
ETL Developer
Helical IT Solutions Pvt Ltd.

Best Open Source Business Intelligence Software Helical Insight Here

A Business Intelligence Framework

Best Open Source Business Intelligence Software Helical Insight is Here
