Date Columns are essential in our Data, having the wrong data can lead to misplacement of data or reading of wrong data.
With the use of DataCleaner we can achieve our goal of either correcting our data. We can also Integrate DataCleaner into our PDI kettle via plugins (available in our coming up Blogs)
Let’s get down to business, imagine having a sample data set, with various date format for our column dob.
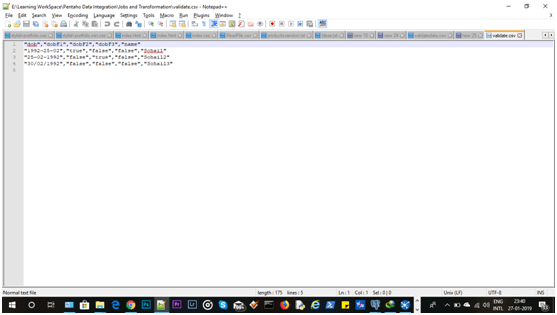
we can easily identify that dob with name Sohail3 is not a valid date now this can get inserted in our DB and we can lose a valid row.
name,dob
Sohail,1992-25-02
Sohail2,25-02-1992
Sohail3,30/02/1992
So, we can use DataCleaner to identify such rows which is as follows:
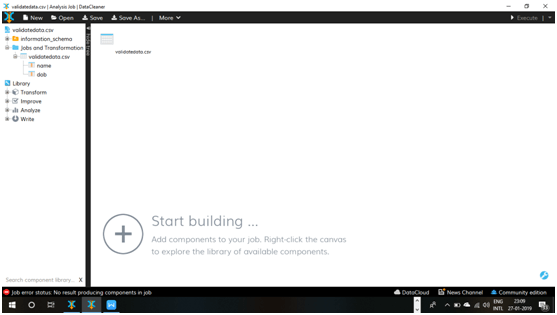
- Let’s have our DataCleaner Up and running:
- Select on Build new Job
- Click on Database or Click to browse, in my case (click to browse) because my source is a csv file named validatedata.
- Select the file from it’s local location and click open
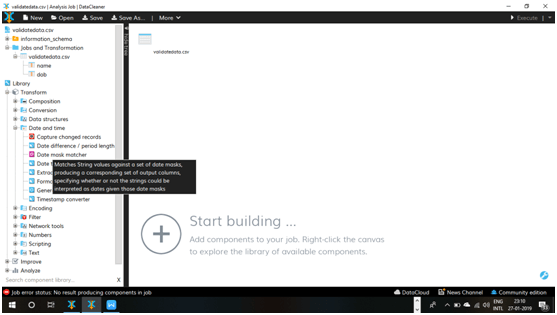
- Now Select the Transform Drop down,
- Select Date and Time and then Select Date Mask Matcher as shown above
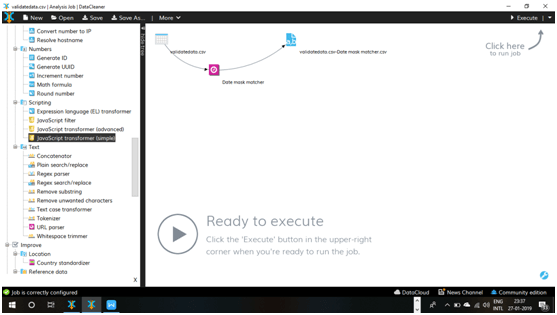
- Right Click on validate data.csv and Select Link To and drag and drop on data mask matcher component as shown below:
- A dialogue box opens as shown below:
- Let’s Preview the data


We now have our validatedata.csv as a source, now we can play around.
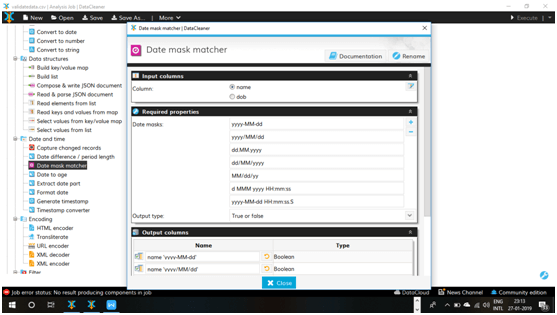
Now in the date mask option, we can select the date format our data hold manually Which are as follows:
1992-25-02 – yyyy-dd-MM
25-02-1992 -dd-MM-yyyy
30/02/1992- dd/MM/yyyy
Don’t forget the column you want to validate, which is dob
We paste this three different format in the input box and Output Type will prompt if it’s a valid date or Not.
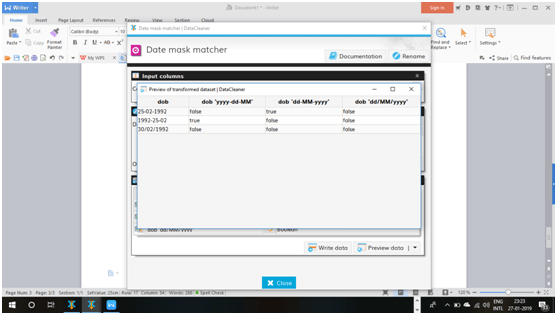
As you can see 30/02/1992 is false for all the date format, now we can tend to remove that data or correct (in our Next blogs we will look into how to do that)
In the mean time, lets export the result into a csv file by Selecting the Write Data option
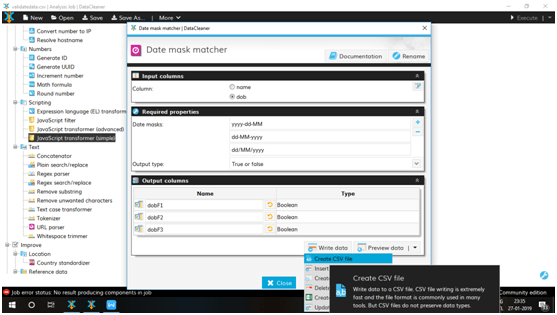
It automatically creates a csv export component
Right Click on the the new component and configure it.
Select the columns we need, Select the File you want to save it to, Select the option to overwrite
And then Execute. Here is a snapshot of our output
What we do next is based on your requirement.
In case if you have any queries please get us at support@helicaltech.com
Thank You
Sohail Izebhijie
Helical IT Solutions Pvt Ltd

Best Open Source Business Intelligence Software Helical Insight is Here