In this blog we are exploring How to create EC2 instance in AWS. An Amazon EC2 instance is a virtual server in Amazon’s Elastic Compute Cloud (EC2) for running applications on the Amazon Web Services (AWS) infrastructure.
In simple words, a server running our application is called an instance. So let us try and create a instance in AWS by following the below steps.
STEP 1: Login to the console and go to services there click on ec2 instance.

STEP 2: Once ec2 instance is opened than click on launch instances

STEP 3: Choose an AMI(amazon machine image)(select free trail for learning) for Linux

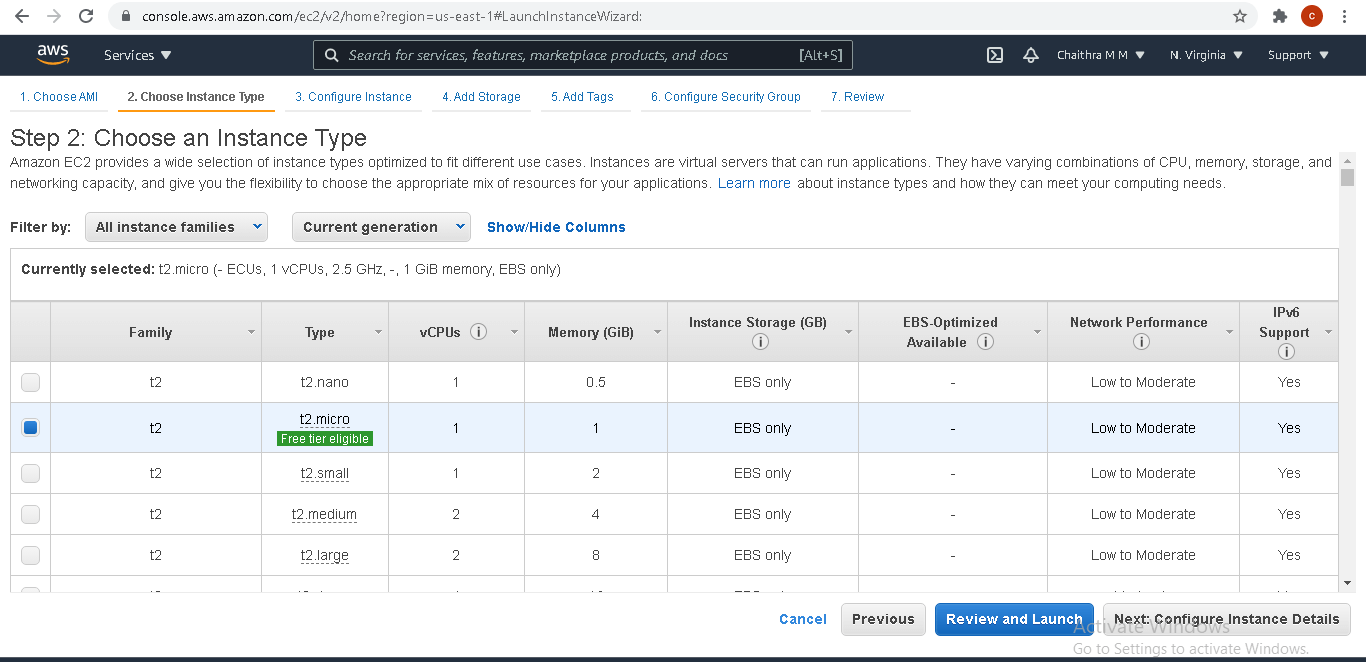
STEP 4: Choose the instance type (means memory and the number of cpu’s)
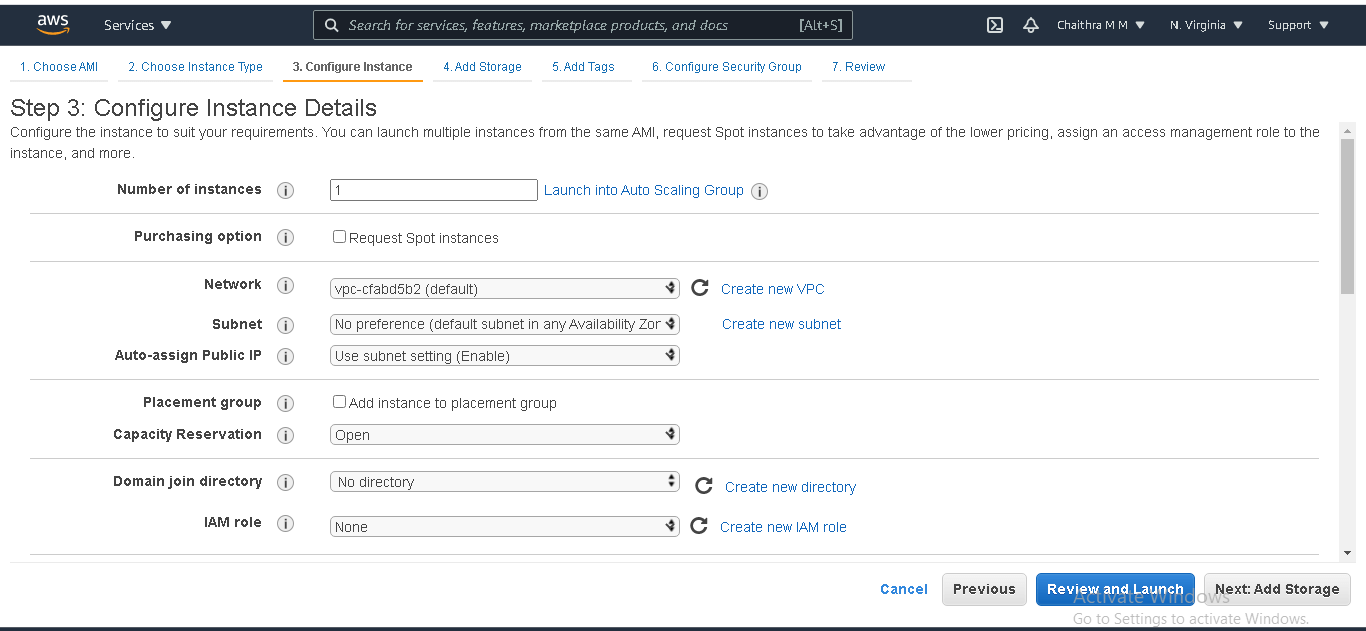
STEP 5: Configure the instances (choose default vpc and subnet at first instance creation).
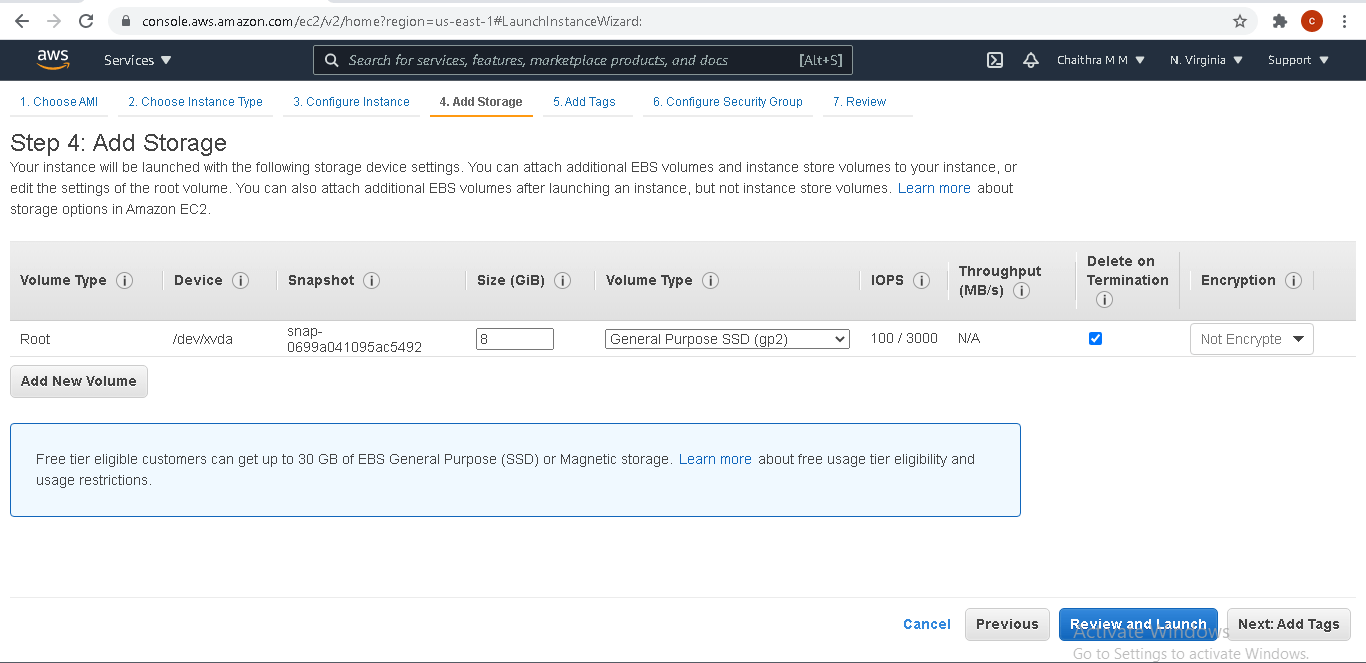
STEP 6: Add the storage details for your instance here.
STEP 7: Add the tags Name as key and value for that

STEP 8: Configure security group add HTTP also to enable the view in web page.

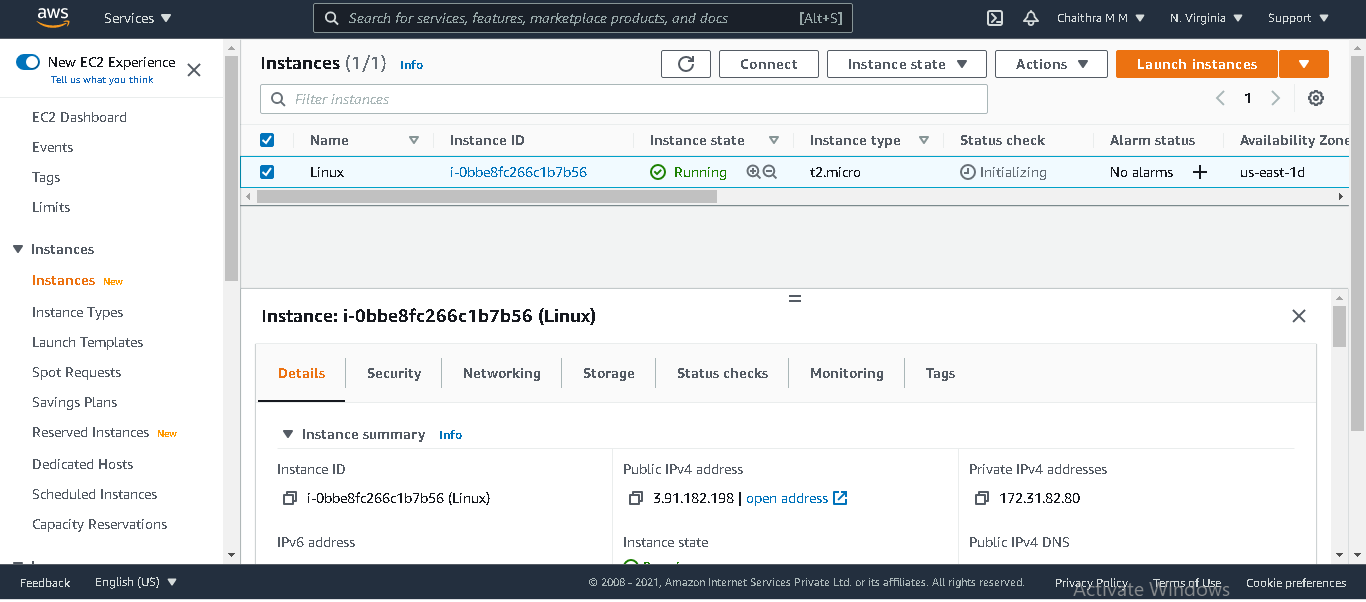
STEP 9: Go to services and ec2, the instance have been launched and now copy the ipv4 ip address.
STEP 10: Open mobaxterm /putty to login to Linux server

STEP 11: Copy the IP address in remote host and specify username as ec2-user for Linux.
Use private key and browse it (.pem)file which is in downloads

Few commands to be used:
sudo su
systemctl enable httpd.service
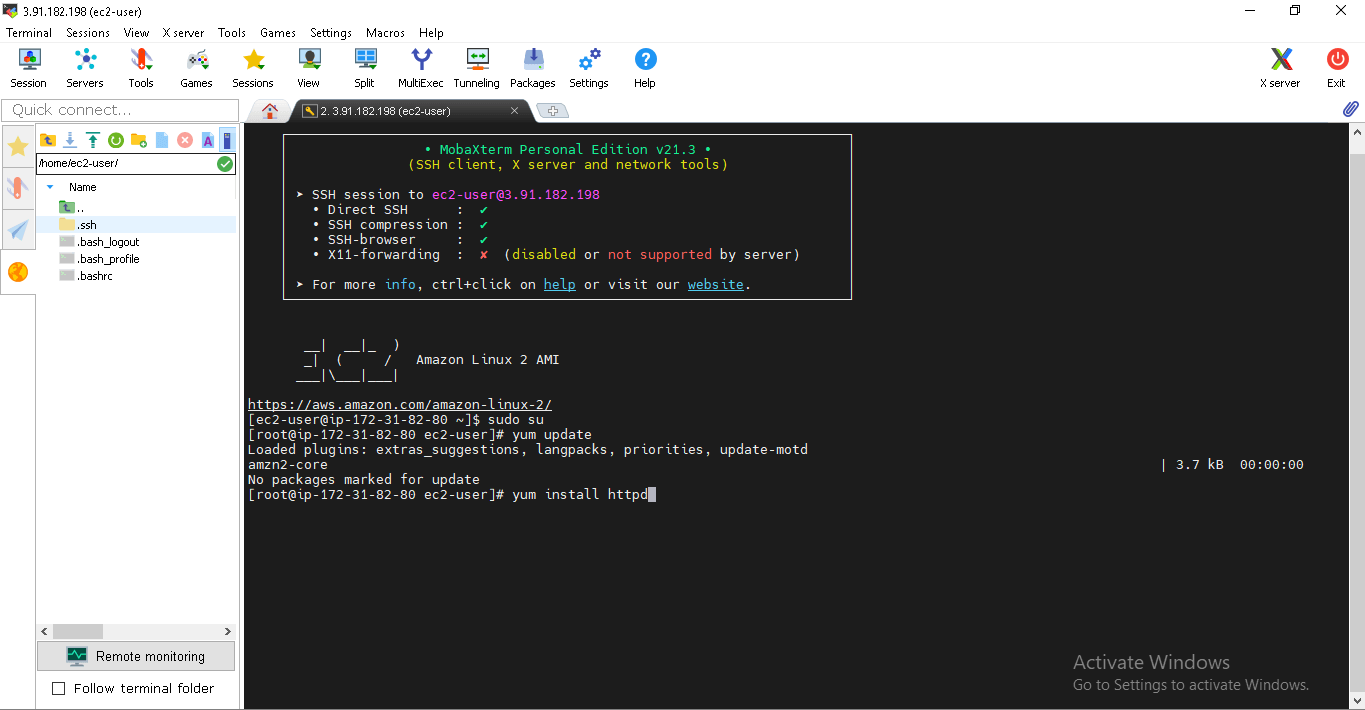
yum update
systemctl status httpd.service
yum install httpd
cd /var/www/html
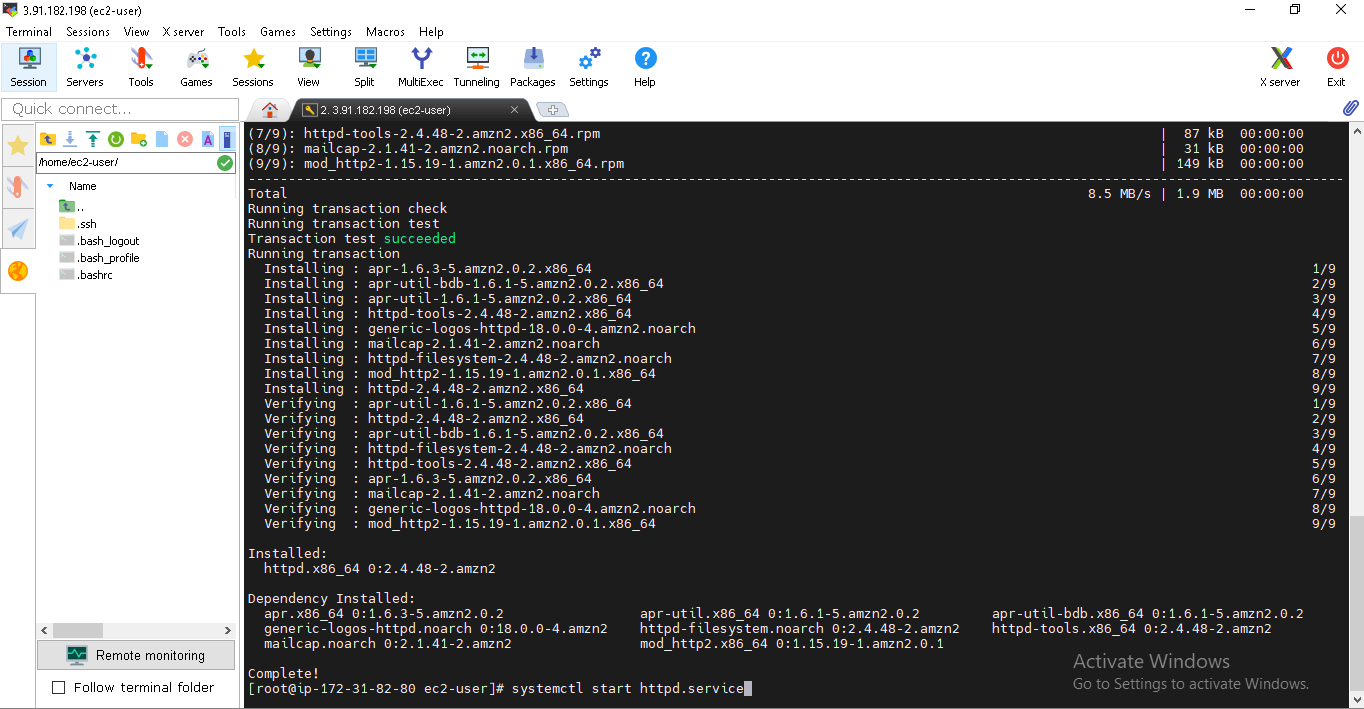
systemctl start
STEP 12: Now we have logged in to the server
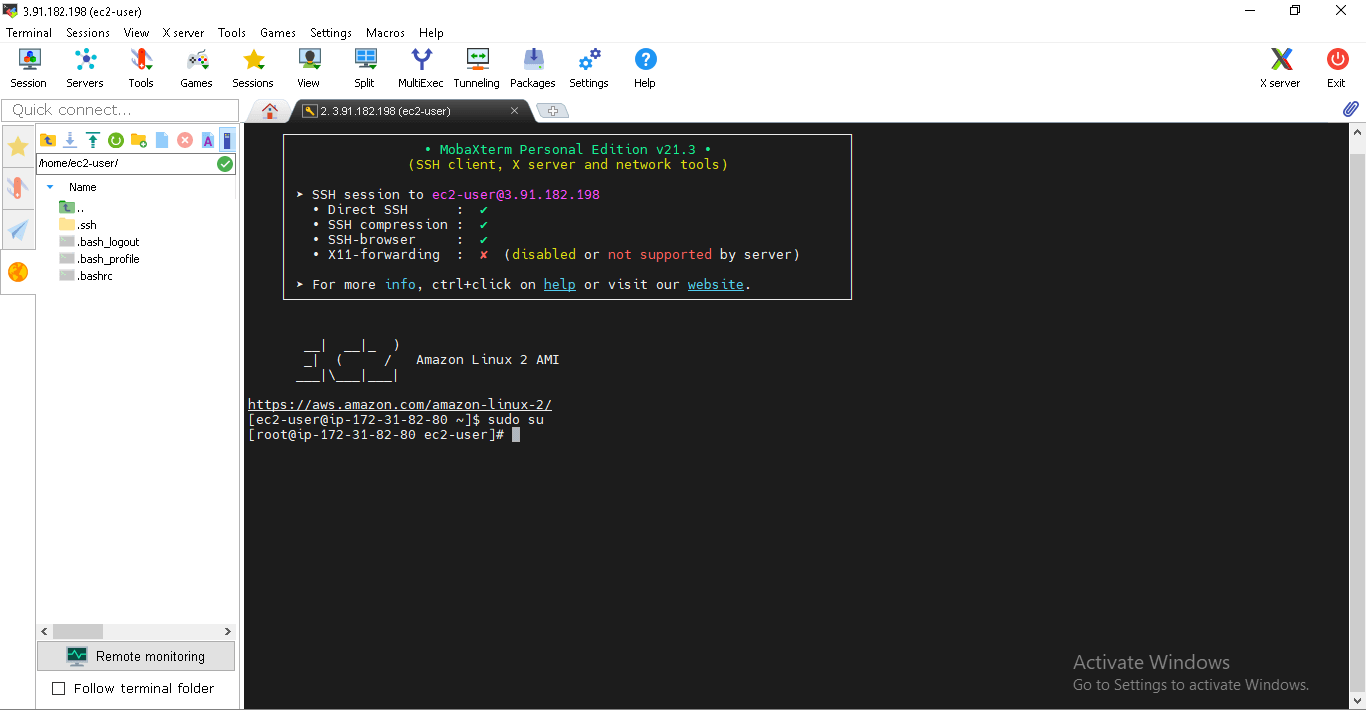
STEP 13: sudosu command to become super administrator /super user.

STEP 14: To install Apache server yum install httpd to deploy in website we need apache.
STEP 15: Httpd installing……….press y and enter to continue

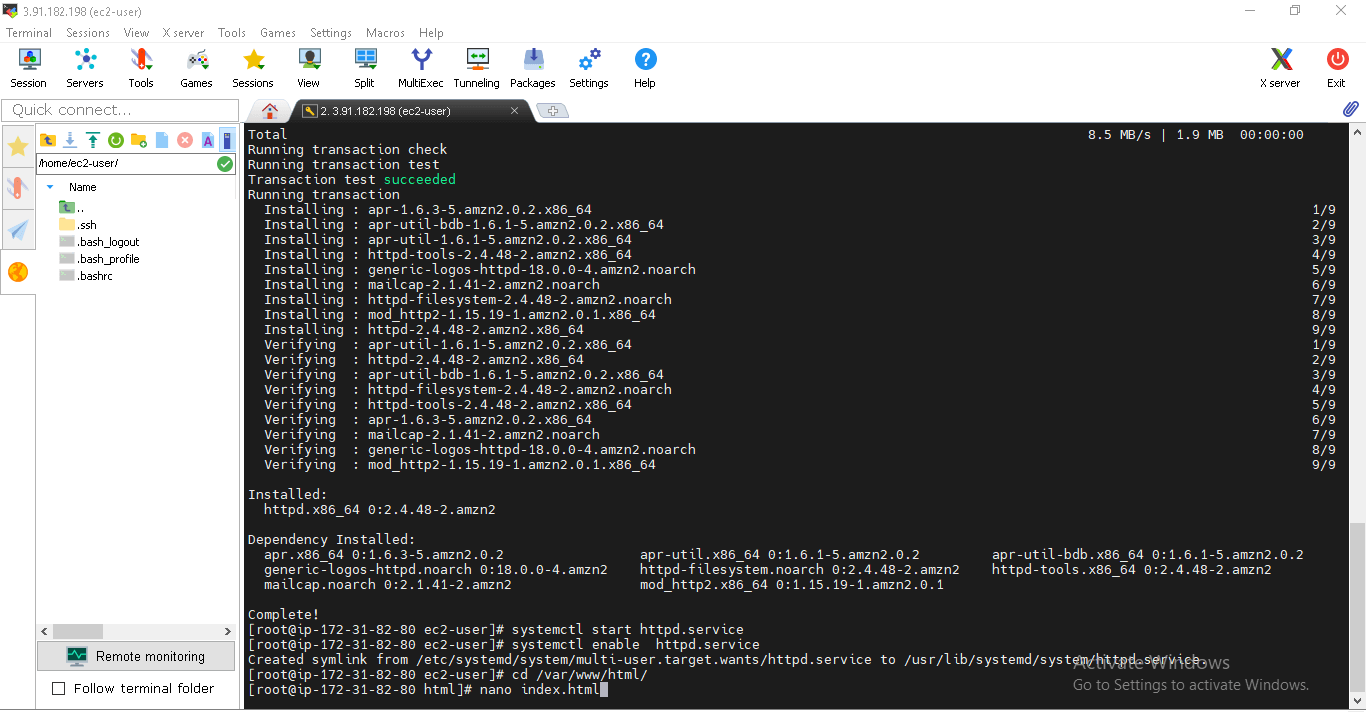
STEP 16: Now start Apache using systemctl start httpd.service
STEP 17: Now enable Apache using systemctl enable httpd.service

STEP 18: Go to html folder to deploy the files in webpage using cd /var/www/html

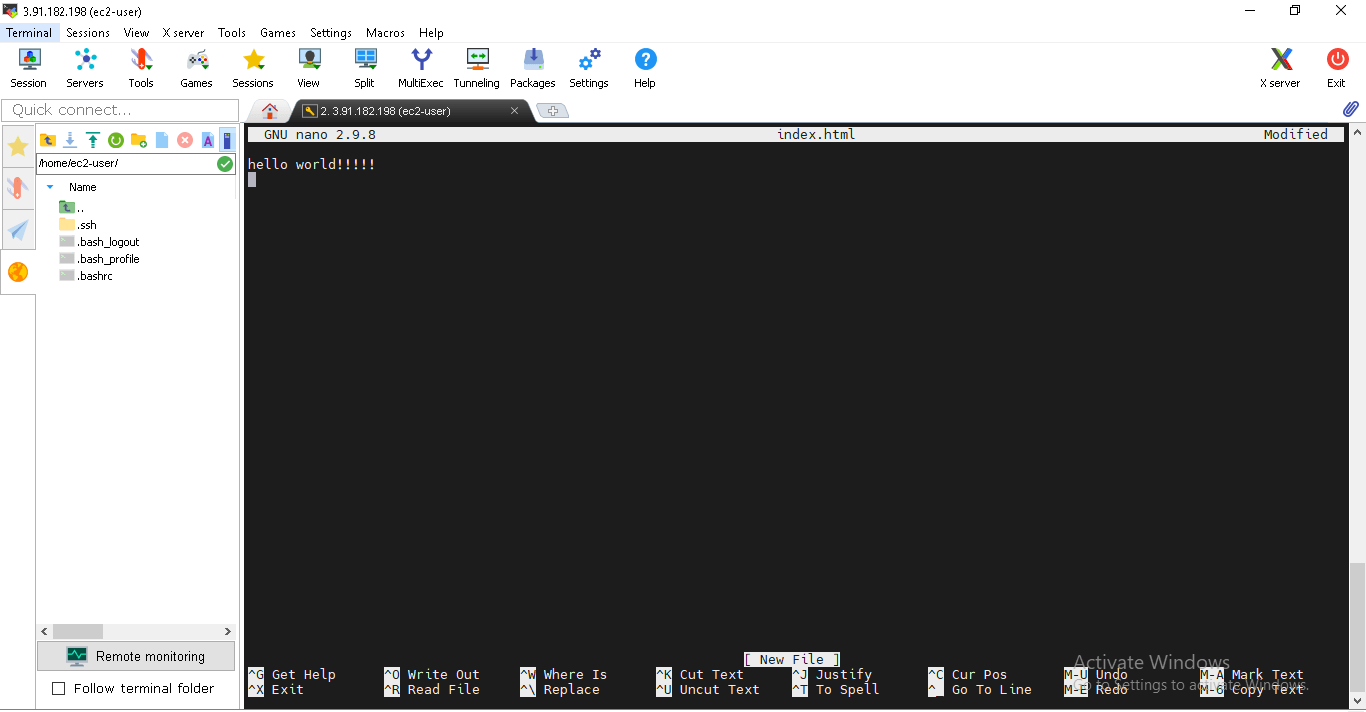
STEP 19: Now we will be in html folder, Using nano index.html create index file and write something.
STEP 20: Write something and save the file using ctrl+x and press y
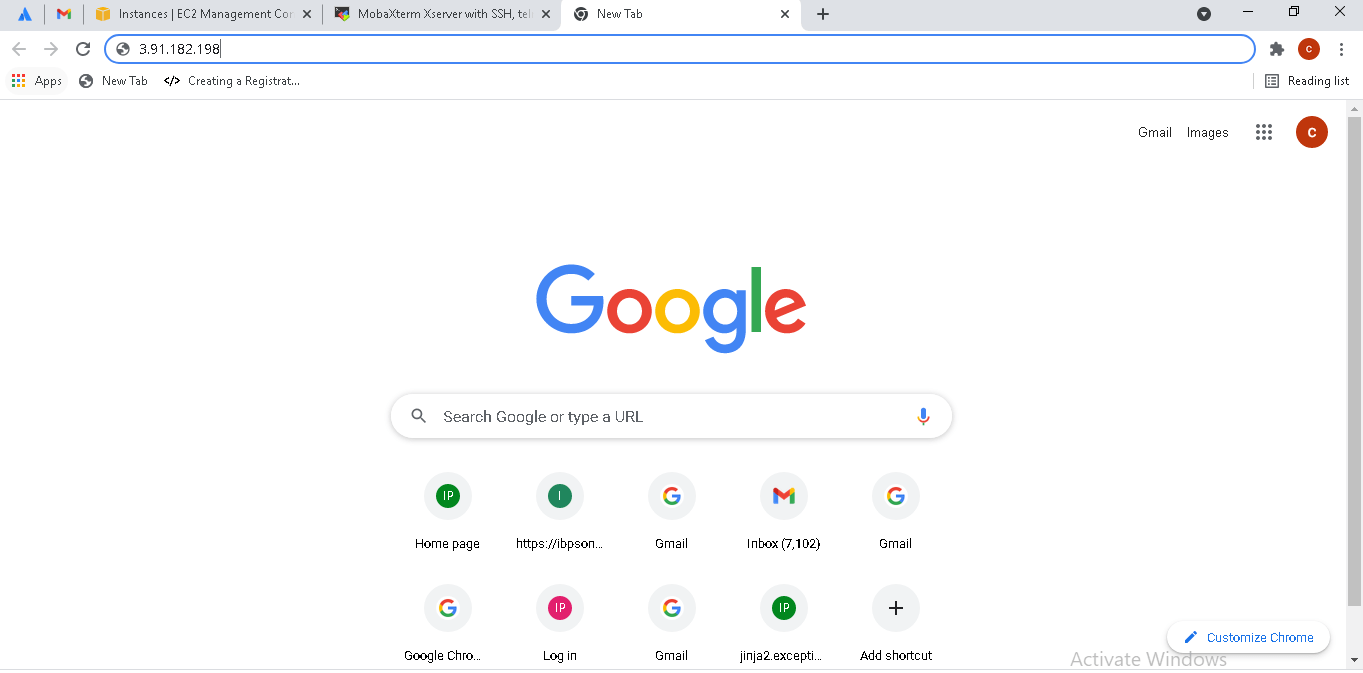
STEP 21: Open google and copy paste the ipv4 ip address
STEP 22: The File is deployed in the website……..!!
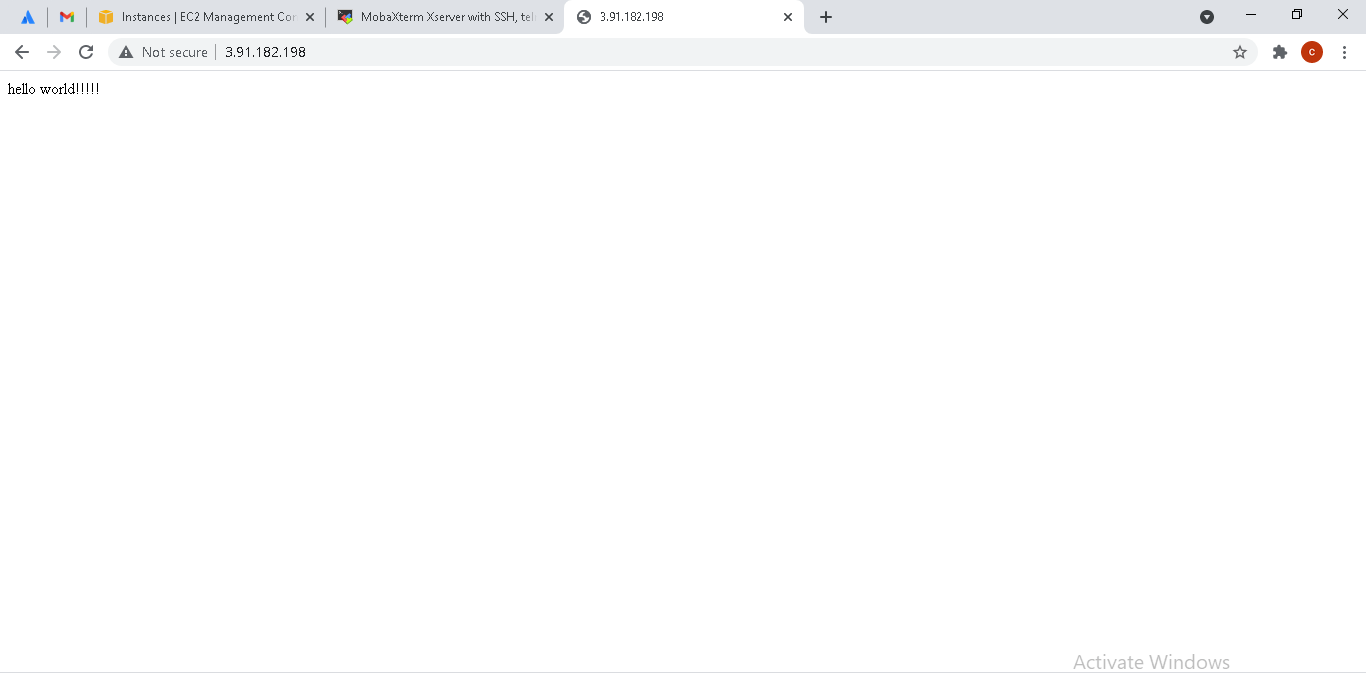
Successfully Created Instance And Deployed Sample File In The Website !
Thank You
Pooja TS
Helical IT Solutions

Best Open Source Business Intelligence Software Helical Insight is Here