Introduction:
DataGrip is a database management environment for developers. It is designed to query, create, and manage databases. Databases can work locally, on a server, or in the cloud. Supports MySQL, PostgreSQL, Microsoft SQL Server, Oracle, and more. If you have a JDBC driver, add it to DataGrip, connect to your DBMS, and start working.
How To ConnectWith Database
Amazon Redshift
- Open data source properties. You can open data source properties by using one of the following options:
- Navigate to File | Data Sources.
- Press Ctrl+Alt+Shift+S.
- c. In the Database Explorer (View | Tool Windows | Database Explorer), click the Data Source Properties icon .
- On the Data Sources tab in the Data Sources and Drivers dialog, click the Add icon and select Amazon Redshift.
- At the bottom of the data source settings area, click the Download missing driver files link. As you click this link, DataGrip downloads drivers that are required to interact with a database. The IDE does not include bundled drivers in order to have a smaller size of the installation package and to keep driver versions up-to-date for each IDE version.
You can specify your drivers for the data source if you do not want to download the provided drivers. For more information about creating a database connection with your driver, see Add a user driver to an existing connection - From the Connection type list, select a type of connection that you want to use:
- Default: connect by using Host, Port, and Database.
- IAM cluster/region: connect by using Database, Region, and Cluster
- URL only: connect by using the JDBC URL that you can copy in settings of your Amazon Redshift cluster.

- From the Authentication list, select an authentication method.
- pgpass: by using the PGPASS file. You can store this file in the user’s home directory (for example, /Users/jetbrains/.pgpass). You can read more about the password file in The Password File at postgresql.org.
- AWS profile: by using a named profile. A named profile is a collection of settings and credentials that you can use for authentication. Named profiles are stored in CREDENTIALS files. Default directories for these files are ~/.aws/credentials (Linux and macOS) and %USERPROFILE%\.aws\credentials (Windows).

- In your Redshift dashboard, create a Redshift cluster.
For more information about the Amazon Redshift cluster, read Getting Started with Amazon Redshift. - In settings of the Redshift cluster, copy the JDBC URL.
- Paste the JDBC URL from the Redshift cluster settings to the URL field in DataGrip.
- In User and Password fields, specify your Redshift credentials.
- To ensure that the connection to the data source is successful, click the Test Connection link.
Apache Cassandra with SSL
Step 1. Create a Apache Cassandra connection
-
Open data source properties. You can open data source properties by using one of the following options:
- Navigate to File | Data Sources.
- Press Ctrl+Alt+Shift+S.
- In the Database Explorer (View | Tool Windows | Database Explorer), click the Data Source Properties icon .
- In the Data Sources and Drivers dialog, click the Add icon and select Apache Cassandra.
- At the bottom of the data source settings area, click the Download missing driver files link. As you click this link, DataGrip downloads drivers that are required to interact with a database. The IDE does not include bundled drivers in order to have a smaller size of the installation package and to keep driver versions up-to-date for each IDE version.
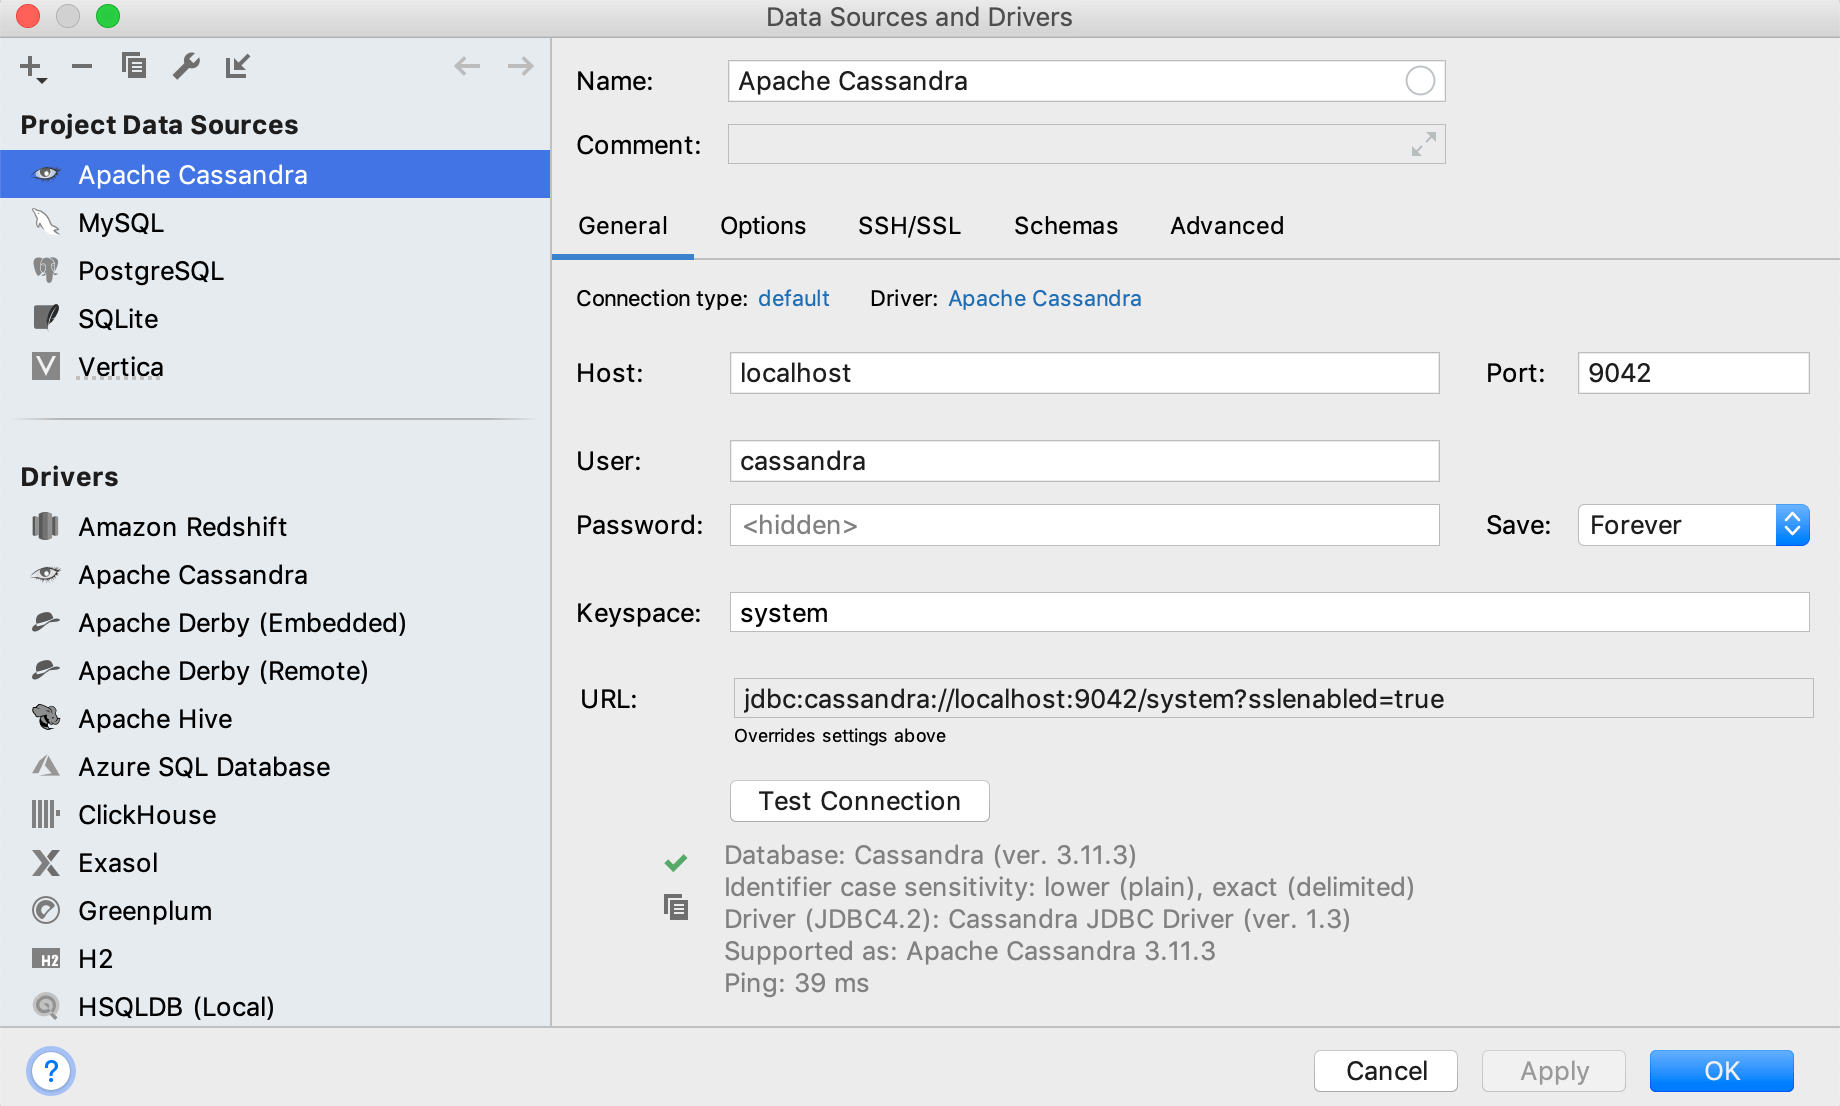
You can specify your drivers for the data source if you do not want to download the provided drivers. For more information about creating a database connection with your driver, see Add a user driver to an existing connection. - In Host, Keyspace, User, Password, and Port fields, specify connection details.
Step 2. Verify the version of the JDBC driver
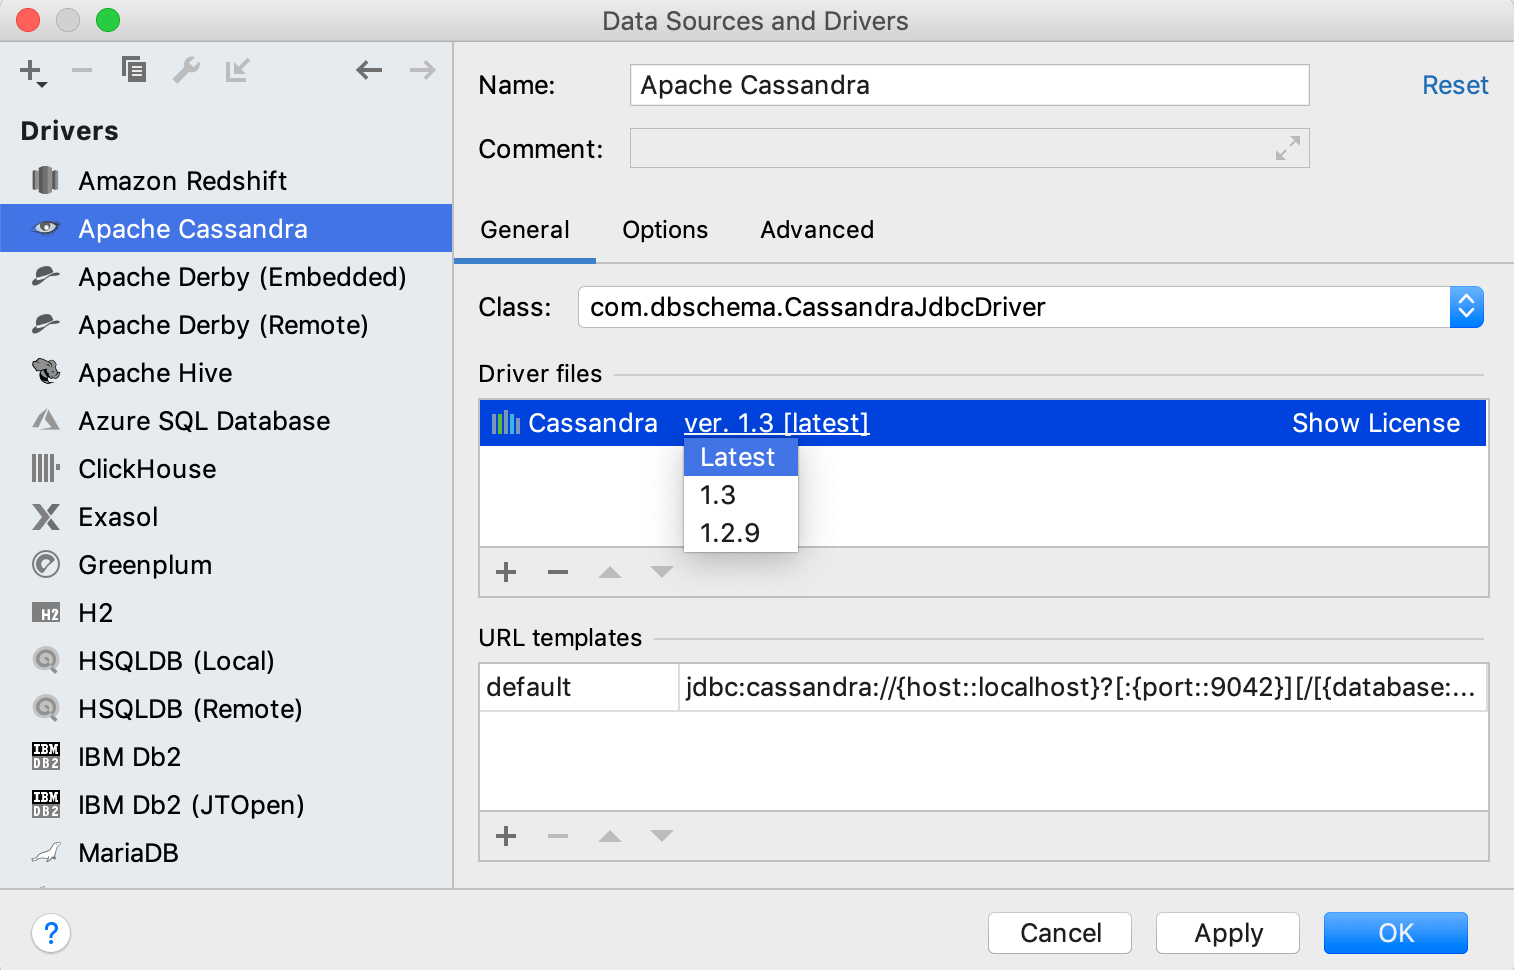
Verify that you use the JDBC driver of version 1.3, or later.

- Open data source properties. You can open data source properties by using one of the following options:
- Press Ctrl+Alt+Shift+S.
- In the Database Explorer (View | Tool Windows | Database Explorer), click the Data Source Properties icon
- In the Drivers list, select Apache Cassandra.
- In the Driver files pane, click ver.
and select Latest or 1.3.
Step 3. Set VM options
- Open data source properties. You can open data source properties by using one of the following options:
- Navigate to File | Data Sources.
- Press Ctrl+Alt+Shift+S.
- In the Database Explorer (View | Tool Windows | Database Explorer), click the DataSource Properties icon .
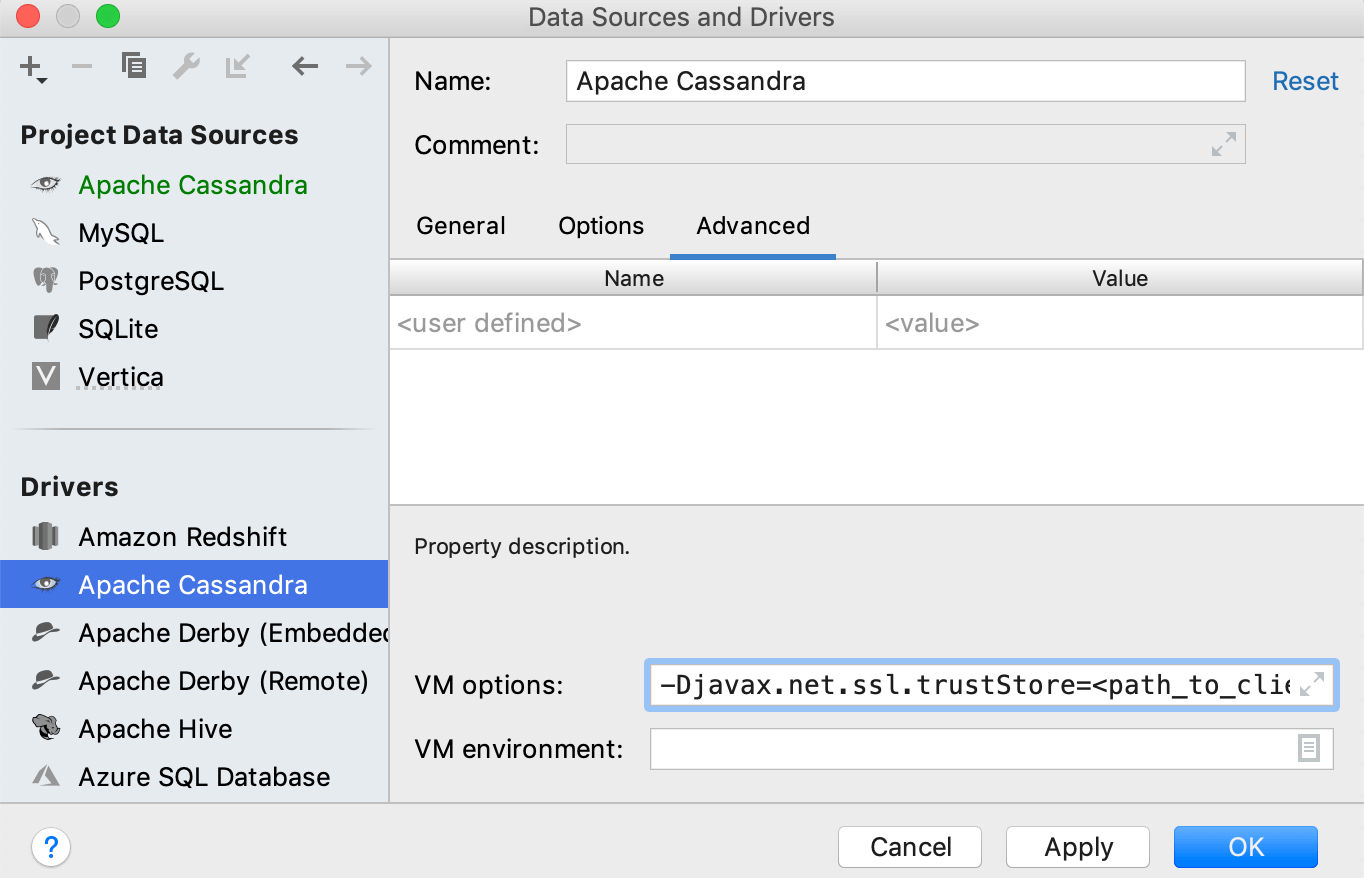
- In the Drivers list, select Apache Cassandra.
- In the driver settings, click the Advanced tab.
- In the VM options field, specify options for authentication.
- Server authentication: your client verifies that the server is correct and trusted. The truststore must contain a public key of the server or the CA certificate that was used to sign the server key.
-Djavax.net.ssl.trustStore= < path_to_client_truststore >
-Djavax.net.ssl.trustStorePassword= < truststore_password > - Client authentication: the server verifies the client that tries to connect to the server.
-Djavax.net.ssl.keyStore= < path_to_client_keystore >
-Djavax.net.ssl.keyStorePassword= < keystore_password >

- Server authentication: your client verifies that the server is correct and trusted. The truststore must contain a public key of the server or the CA certificate that was used to sign the server key.
Step 4. Add the sslenabled option to the JDBC URL
- Add the sslenabled=true option to the JDBC URL. For example, jdbc:cassandra://localhost:9042/?sslenabled=true.
- To ensure that the connection to the data source is successful, click Test Connection.

Thank You,
Mahendran
Helical IT Solutions
Subscribe
Login
0 Comments