This blog covers the process of applying data security for interactive reports in Pentaho based on logged in user.
Pentaho Interactive Reporting is a drag-and-drop, browser-based design environment for interactive reports that allows you to quickly add elements to your report and format them to your preference.
This option is present in Pentaho Enterprise edition.
To apply data security, customized data model has to be created for interactive reports which are created through a tool called Pentaho metadata-editor.
To create a data source in Pentaho Metadata Editor, go through the blog
creating a data source for interactive reports in Pentaho
To create a customized data model, below are the steps to be followed:
- Open the data source ‘SecuredReport’ created in the mentioned blog.
- The Pentaho Metadata Editor must be configured to connect to your Pentaho Server so that it can retrieve user names, roles, and access control lists.
- From the Pentaho Metadata Editor main window,
- Type the correct URL in the Service URL text box.
- Select the level of detailed security information you want: All, Users, or Roles.
- Type admin in the User Name text field. This is the default Admin user for the Pentaho User Console.
- Type password in the Password text field. This password is associated with the default Admin user. Click Test.
- To restrict the data, we have to apply the desired condition to the metadata. Any condition to be applied should be first applied to the model and then the table.
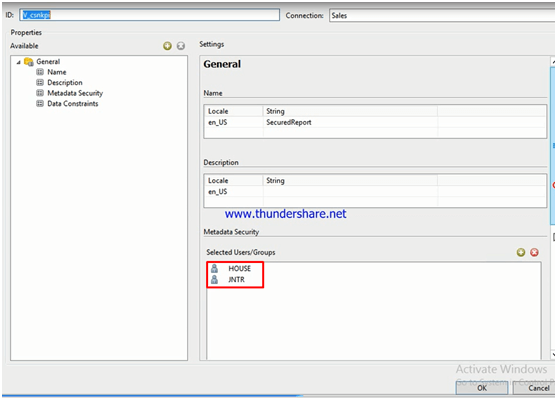
- Right Click on the model and click on Edit.
- Add the users in the ‘Selected Users/Groups’ tab under the ‘Metadata Security’ section as shown. It means that only the selected users ‘HOUSE’ and ‘JNTR’ can see the data source.
- We can also edit the view and select the users who can have the right to see the view based on the requirement which is nothing but table restriction for specific users.
- For data restriction, we should write a condition in ‘Global_Constraint’ in ‘Data Constraints’ tab under the ‘Metadata Security’ section. Even this should be done on the model first and then on the view as shown.
- Save the data source and publish.
- Now, log in as different users and create the same report from the data source and test.
Now we would make changes to the data source such that the report created in the blog would show the values corresponding to the logged-in user.
select Tools > Security. The Security Service dialog box appears.
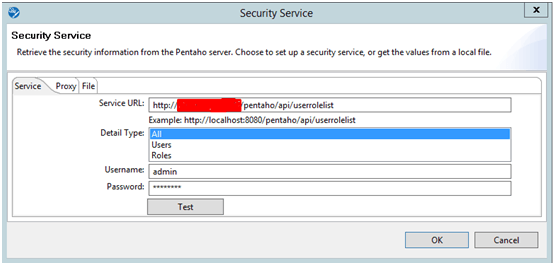
If the information you entered is correct, a listing of users and roles appears, as shown


We have used ‘OR’ condition i.e. if logged in user is ‘HOUSE’ then data related to HOUSE is shown if admin then all data is shown.
Condition : OR([TABLE_NAME.FIELD_NAME]=USER());USER()=”admin”
User() is the function which gives logged is user name..


In case if you have any queries please get us at support@helicaltech.com
Thank You
Mounika Pulimamidi
BI Developer
Helical IT Solutions Pvt Ltd

Best Open Source Business Intelligence Software Helical Insight Here