Prerequisites
1. A System with docker installed on it.
Introduction
Containerization, driven by the magic of Docker, has completely changed the game for building and launching applications. In this section, we are going to dive into the heart of containerization, shedding light on why it is so crucial in the world of software.
Cracking the Compatibility Code:
Remember the headache of making software work everywhere? Docker swoops in to solve this problem. It encapsulates all the dependencies an app needs in a tidy “container.” No more worrying if it will work on different machines, docker does take care of it.
Consistency is Key:
Docker’s containers bring order to chaos. An app in a Docker container behaves the same way wherever you put it – whether it is on a coder’s laptop, a testing server, or a production machine. This means less confusion and way smoother teamwork between all the stages of app lifecycle.
Scaling Without the Sweat:
Docker is not just about packaging. It is also about growing. Imagine you need more of your app to handle loads of users. Docker can copy and spread your app across many computers.
Rest of this blog we are going to create a flask app, build docker image and deploy the image in docker containers.
Architectural Overview: Scaling with Docker and NGINX Load Balancer
The architecture leverages Docker containers and NGINX load balancer to ensure high availability, efficient distribution of incoming traffic, and streamlined management.
Client:
The architecture starts with the “Client” component. This is where user requests originate. Clients could be web browsers, mobile apps, or any device that communicates with our Flask application.
Architecture Diagram:

NGINX Load Balancer:
Next up is the “NGINX Load Balancer.” This acts as the traffic director, distributing incoming requests from the client to the available Docker containers. The load balancer ensures an even distribution of requests, preventing any single container from becoming overloaded. This balance enhances the application’s responsiveness and prevents bottlenecks.
Flask App Containers:
At the core of the architecture are the “Docker Containers.” These containers encapsulate individual instances of your Flask application. Each container operates independently, complete with its own set of dependencies, libraries, and configurations. The architecture diagram depicts nine containers, demonstrating the potential for scalability and handling high volumes of traffic.
Now, let’s create one simple endpoint using python and flask.
In this project, we are keeping things focused and straightforward. Our goal is to create a Flask application that serves JSON data in response to a GET request.

gateway.py

Let’s run and verify response:
By default flask application runs on port 8000.
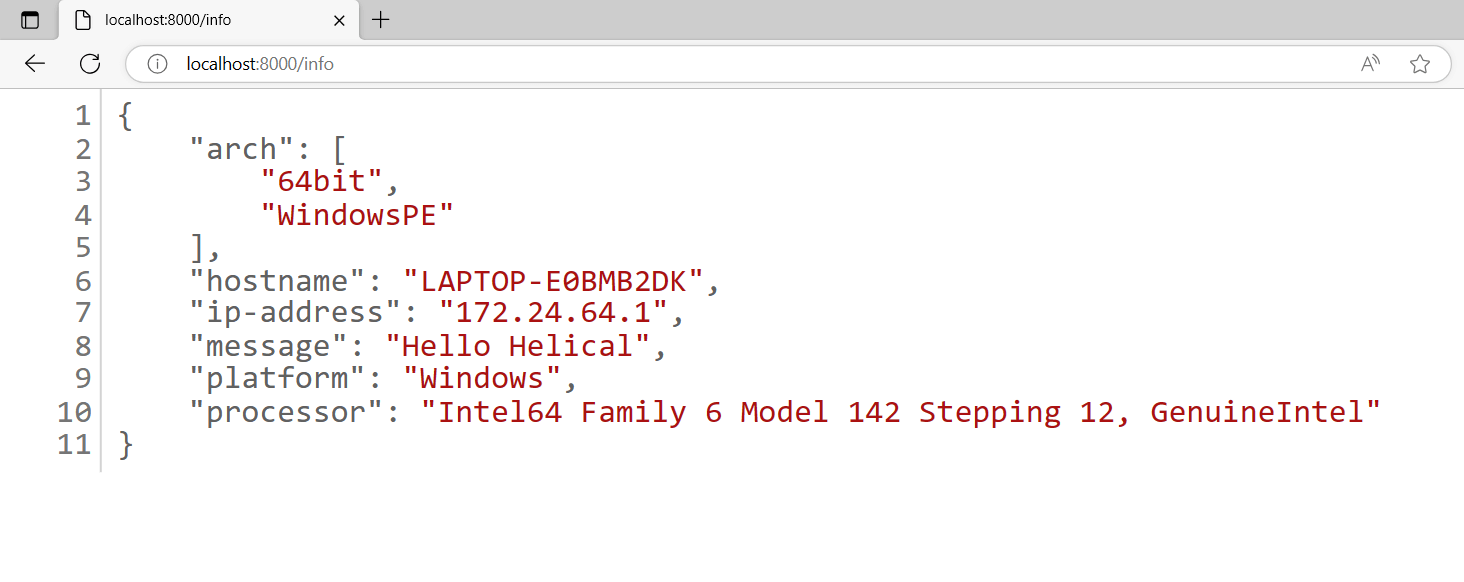
Endpoint URL :http://localhost:8000/info

With our application now operational, we can proceed to test the endpoint by accessing the URL mentioned above.
Since it is a GET request, we can hit the endpoint in any web browser.
Upon sending the request, the response delivers JSON data containing details about the host machine. This information becomes useful as we utilize it to verify whether our traffic is being appropriately distributed across the various containers.
let’s proceed to the next phase to explore Docker and verify the dynamic distribution of traffic across the containers.
Building Docker image:
Now, with our application running smoothly on our local machine at port 8000 and functioning as intended, we are ready to take the next step: creating a Docker image and setting up containers.
For this task, we will start by crafting a Dockerfile in the root folder of our application, following the structure outlined in the project structure diagram.
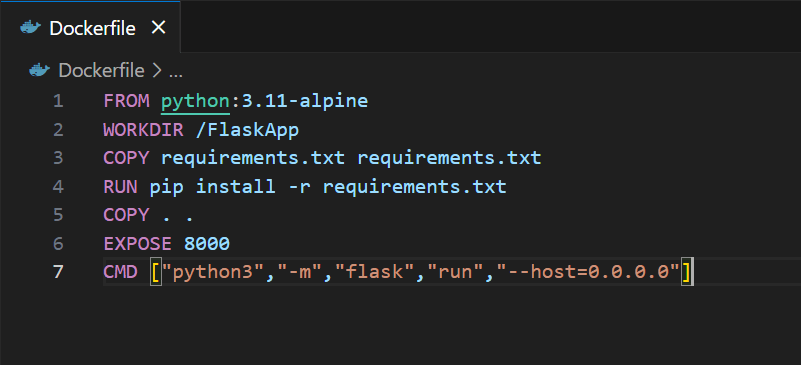
Now, let’s delve into understanding the Dockerfile.
FROMpython:3.11-alpine
This line instructs Docker to utilize the `python:3.11-alpine` as the base image. This base image is built on the Alpine operating system and comes pre-equipped with Python 3.11.
WORKDIR/FlaskApp
Here, we define the working directory. All the essential application files will find their home in this designated location.
COPYrequirements.txtrequirements.txt
We copy requirements.txt to container, so that all the required dependencies will be installed.
RUNpipinstall-rrequirements.txt
And then we run this command to install all the libraries mentioned in the requirements.txt file.
COPY..
This command will copy all the project files to the current working directory in container (check step 2) from the current directory
EXPOSE8000
This command exposes the port 8000, so that we can access the application outside the container.
CMD[“python3″,”-m”,”flask”,”run”,”–host=0.0.0.0″]
Finally, we execute the command to run application.
That’s it our docker file is ready, now the next step is to build the image. To build the docker image, Docker engine is required.
Once it isinstalled, we build the image using below command
Command: docker build -t flask-app:1.0 .
This command will execute all the instructions mentioned in Dockerfile and creates one image file.
To verify if image created or not we list all the docker images and check if exists or not.

We can see our image in image list.

And now, we come to the final part of this blog, which is running this image on container. We can run this single image using
Command: docker run -it -p8000:8000 flask-app:1.0
But this approach not going to meet our requirement of making the application scalable and highly available.
To make this scalable and highly available, we create one more file docker-compose.yml in our project rool level and we use the flask-app:1.0 image in the file along with nginx:latest image
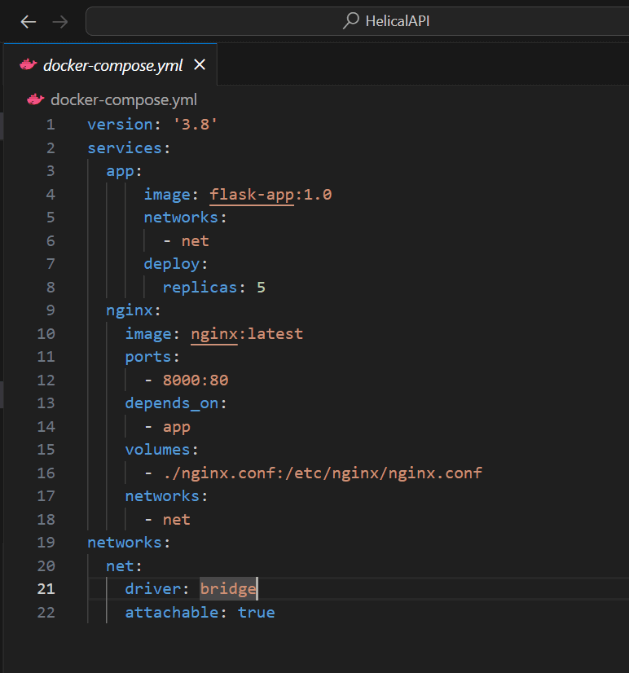
in this file, we created 2 services and one network
First service is our app and second one is nginx load balancer.
– Load balancer runs on the port 80 and we are forwarding port from host to container in the nginx ports section.
– So, if we access the application on port 8000 , the request will be forwarded to the nginx container.
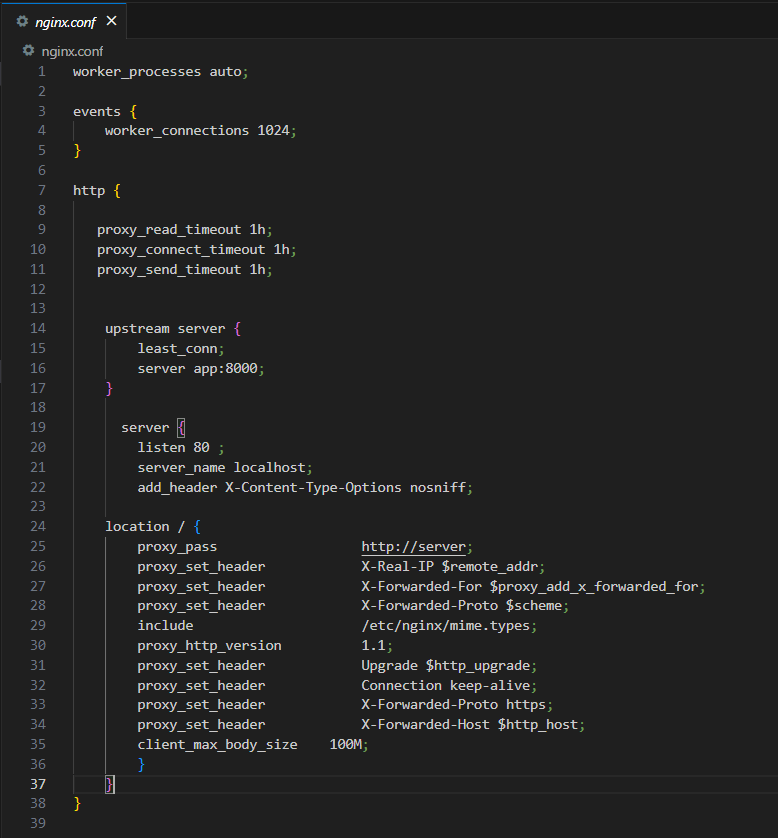
– Further, nginx will redirect the traffic based on its configuration
We also have some configuration related to nginx mounted on our host machine.
Nginx configuration contains the information about redirecting the traffic to the target servers
Here our target servers are containers which are running on port 8000.
And that’s it, our docker-compose.yml file is now ready to execute and ship containers.
We execute the docker-compose.yml file using
Command: docker-compose up -d

The docker-compose.yml file created 5 flask-app containers (we have mentioned replicas=5 in yml file) and one nginx load balancer.
To verify if every container is up and running, list all the containers using
Command: docker container ls
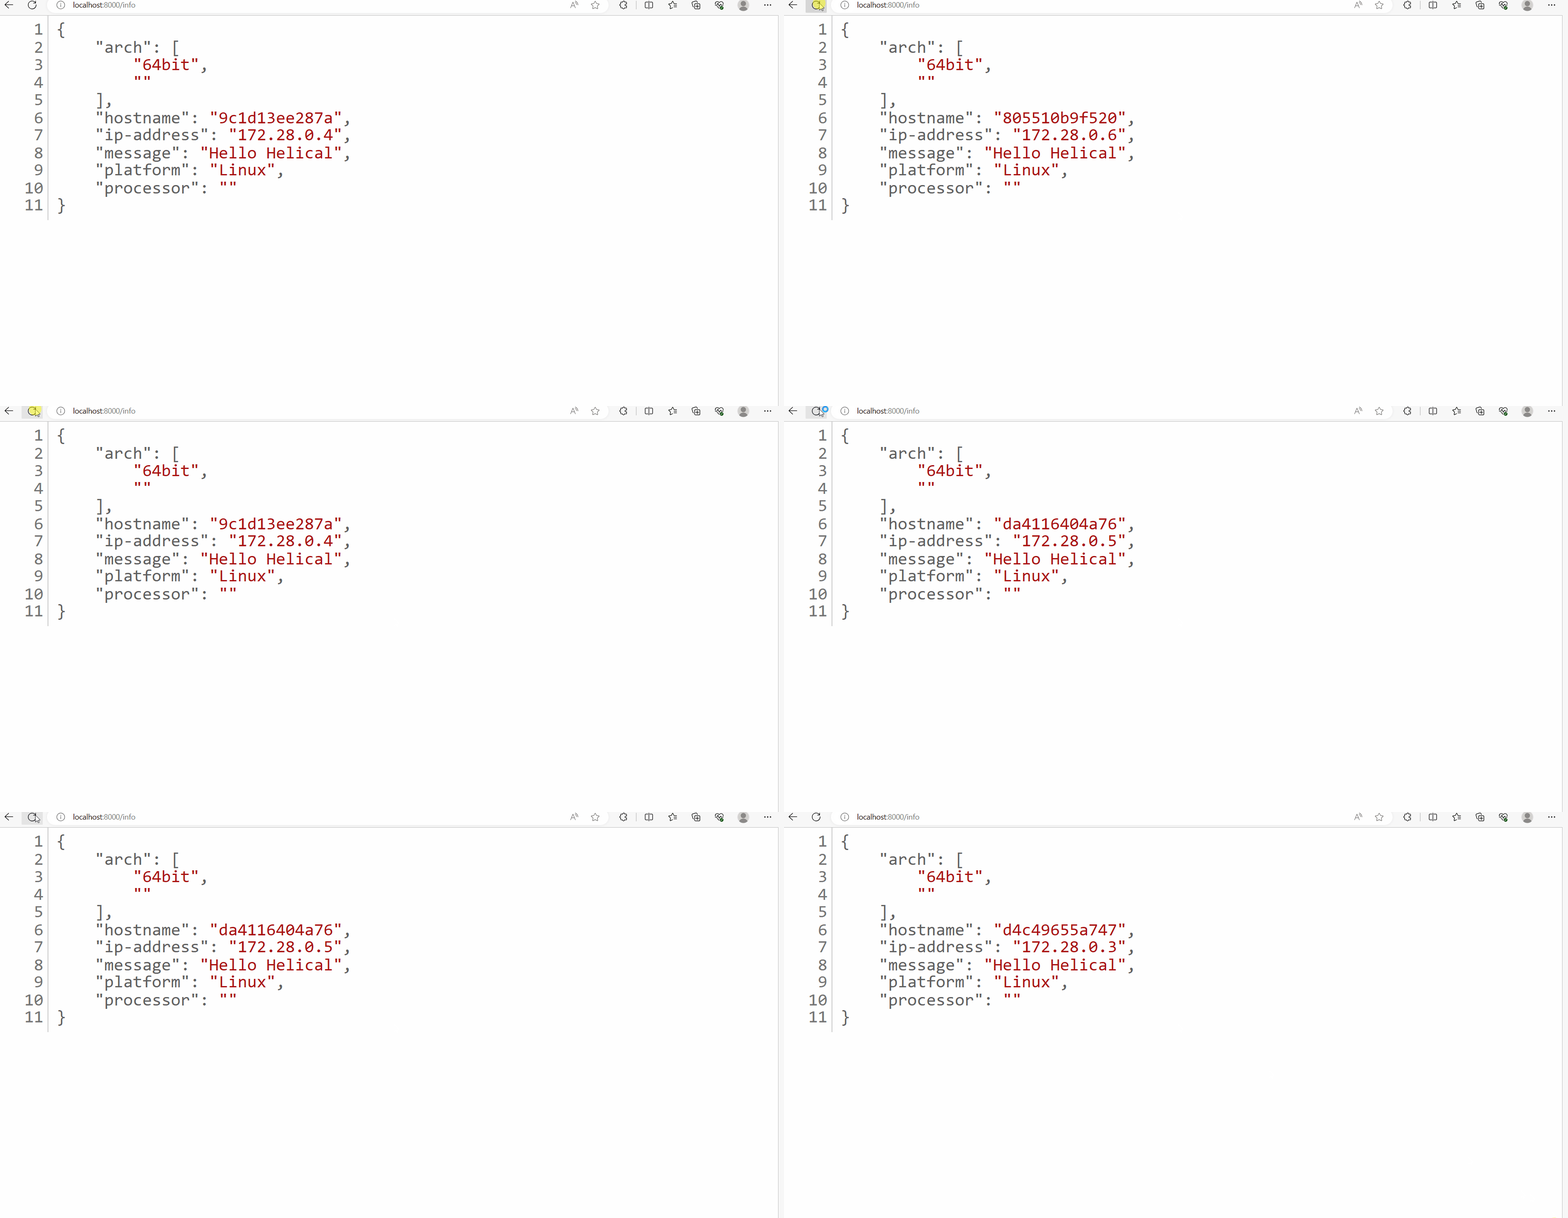
Observe the status of each individual container. Currently, all containers are in an operational state. At this point, we can proceed to verify whether each container is capable of processing requests by accessing the designated endpoint.
Endpoint URL :http://{nginx-ip}:{port}/info =>http://localhost:8000/info


Take a moment to observe the dynamic behaviour of the architecture. With each refresh, NGINX is intelligently directing incoming requests to different Docker containers. This strategic distribution of requests showcases the successful orchestration of our containers and the efficient load balancing performed by NGINX.
Thank You
Mahesh Chary
Helical IT Solutions

Best Open Source Business Intelligence Software Helical Insight is Here
