Connect to a database with SSL
1. Open data source properties. You can open data source properties by using one of the following options:
o Navigate to File | Data Sources.
o Press Ctrl+Alt+Shift+S.
o In the Database Explorer (View | Tool Windows | Database Explorer), click the Data Source Properties icon .
2. On the Data Sources tab, select a data source that you want to modify.
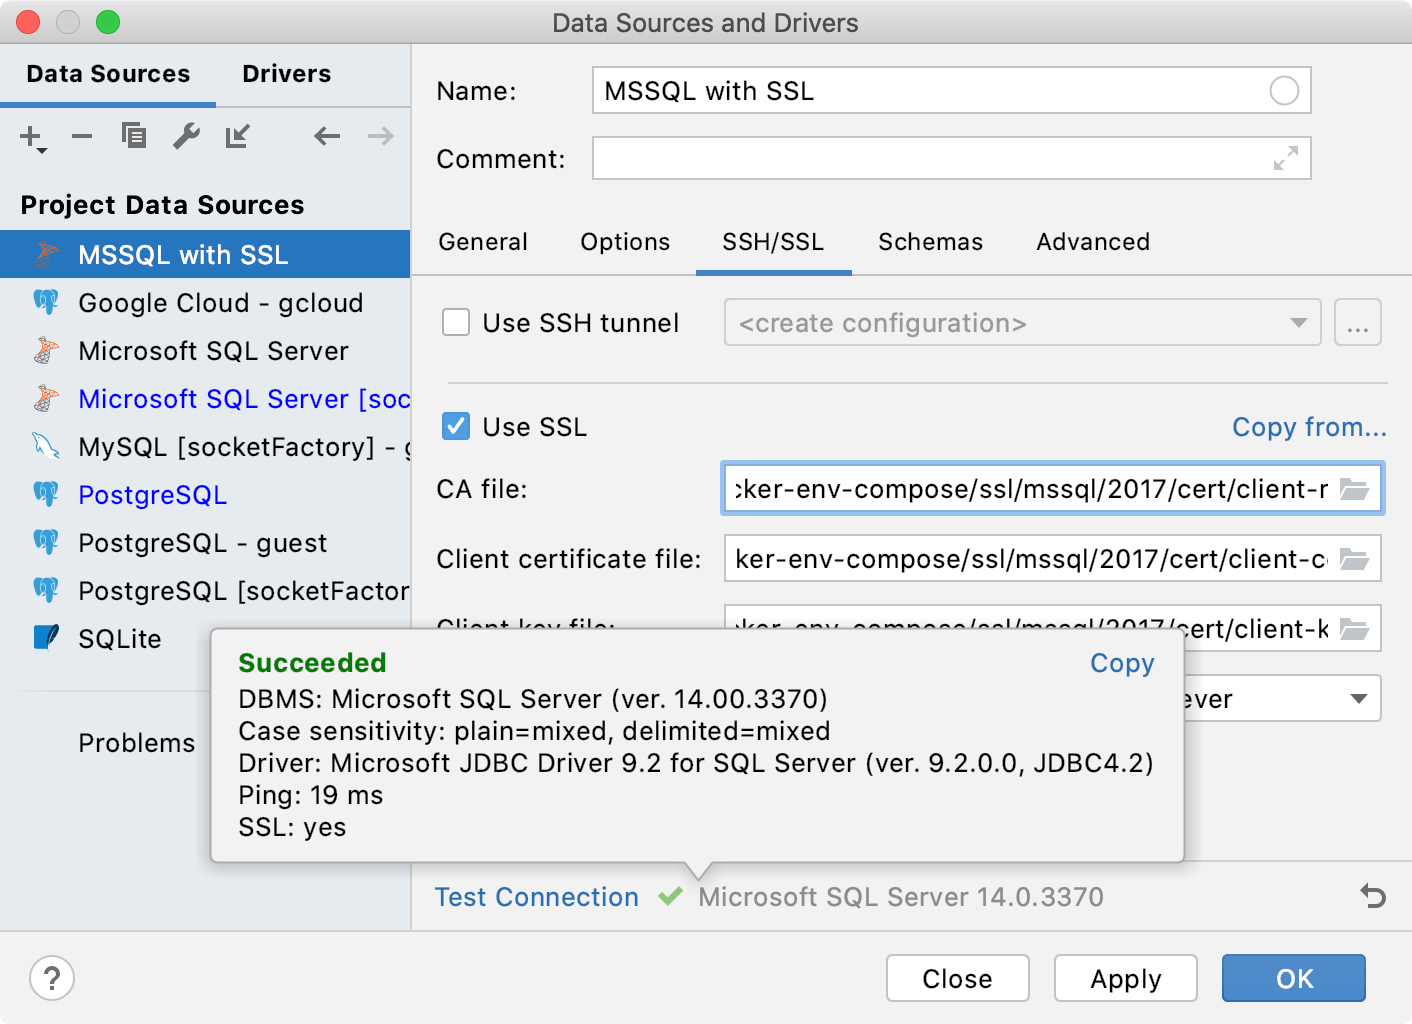
3. Click the SSH/SSL tab and select the Use SSL checkbox.
4. In the CA file field, navigate to the CA certificate file (for example, mssql.pem).
5. In the Client certificate file field, navigate to the client certificate file (for example, client-cert.pem).
6. In the Client key file field, navigate to the client key file (for example, client-key.pem).
7. From the Mode list, select the verification mode:
o Require: verifies that the server accepts SSL connections for this IP address and recognizes the client certificate.
o Verify CA: verifies the server by checking the certificate chain up to the root certificate that is stored on the client.
o Full Verification: verifies the server host to ensure that it matches the name stored in the server certificate. The SSL connection fails if the server certificate cannot be verified.
8. To ensure that the connection to the data source is successful, click Test Connection.
Disable SSL connection to a database
1. Open data source properties. You can open data source properties by using one of the following options:
o Navigate to File | Data Sources.
o Press Ctrl+Alt+Shift+S.
o In the Database Explorer (View | Tool Windows | Database Explorer), click the Data Source Properties icon .
2. On the Data Sources tab, select a data source that you want to modify.
3. Click the SSH/SSL tab and clear the Use SSL checkbox.
4. Click Apply.
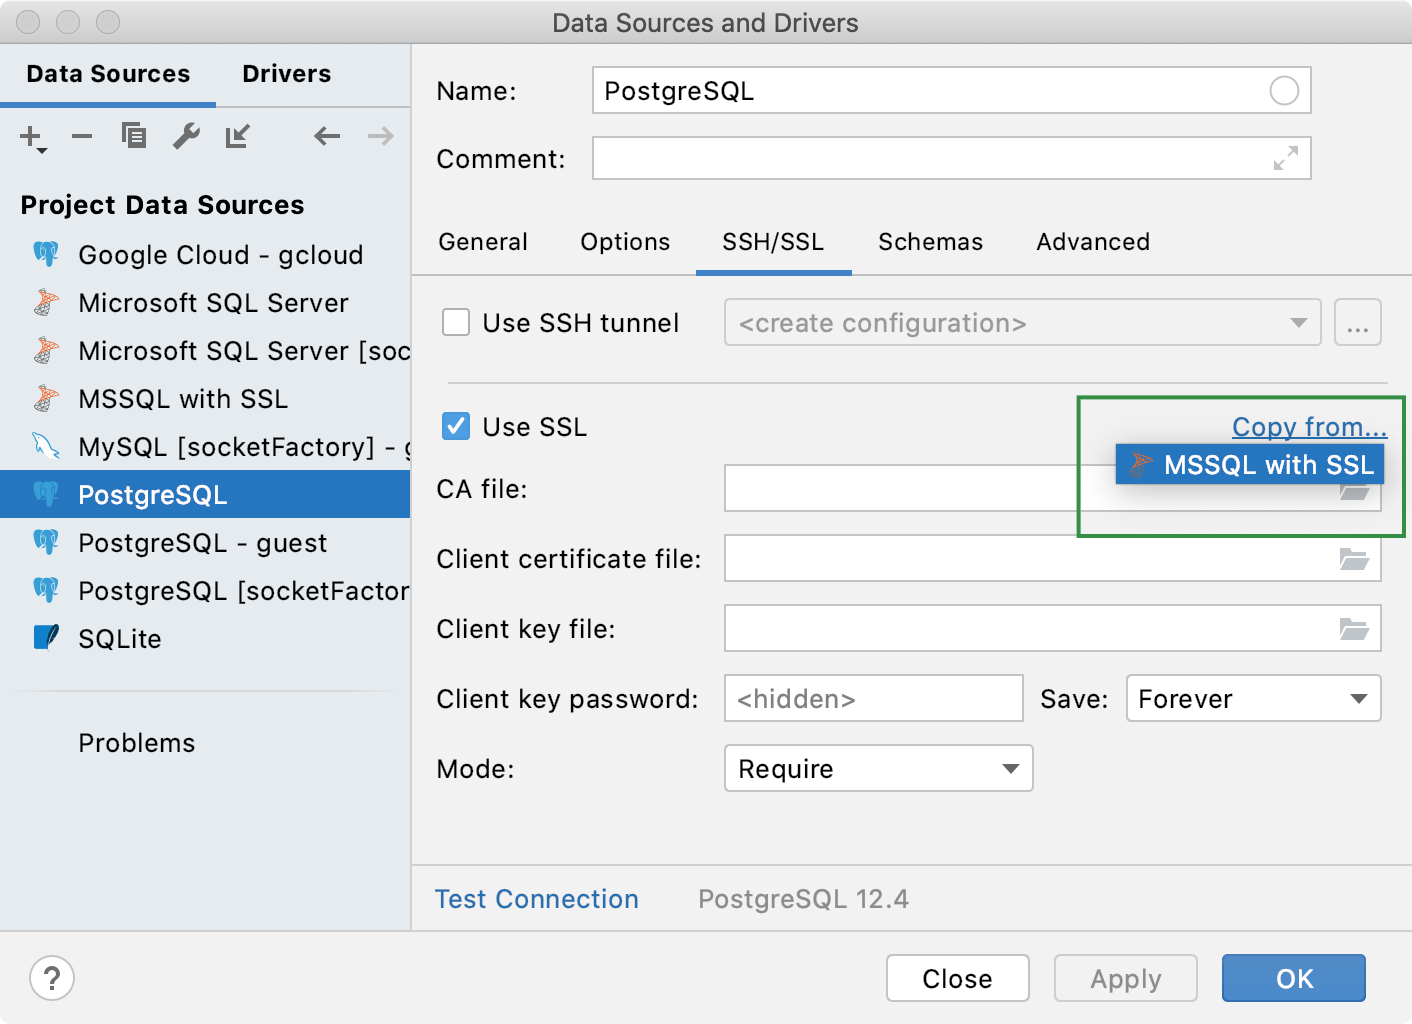
Copy SSL settings from other data sources
If you configured SSL settings for one data source, you can copy them for another data source.
1. Open data source properties. You can open data source properties by using one of the following options:
o Navigate to File | Data Sources.
o Press Ctrl+Alt+Shift+S.
o In the Database Explorer (View | Tool Windows | Database Explorer), click the Data Source Properties icon .
2. On the Data Sources tab, select a data source that you want to modify.
3. Click the SSH/SSL tab and select the Use SSL checkbox.
4. Click the Copy from … link and select the configuration that you want to copy.
SSH
Secure Shell or SSH is a network protocol that is used to encrypt a connection between a client and a server.
All created SSH connections are shared between all the data sources that you have in a project. If you do not want to share a connection between projects, select the Visible only for this project checkbox in the SSH connection settings.
Connect to a database with SSH
1. Open data source properties. You can open data source properties by using one of the following options:
o Navigate to File | Data Sources.
o Press Ctrl+Alt+Shift+S.
o In the Database Explorer (View | Tool Windows | Database Explorer), click the Data Source Properties icon .
2. Select a data source profile where you want to change connection settings.
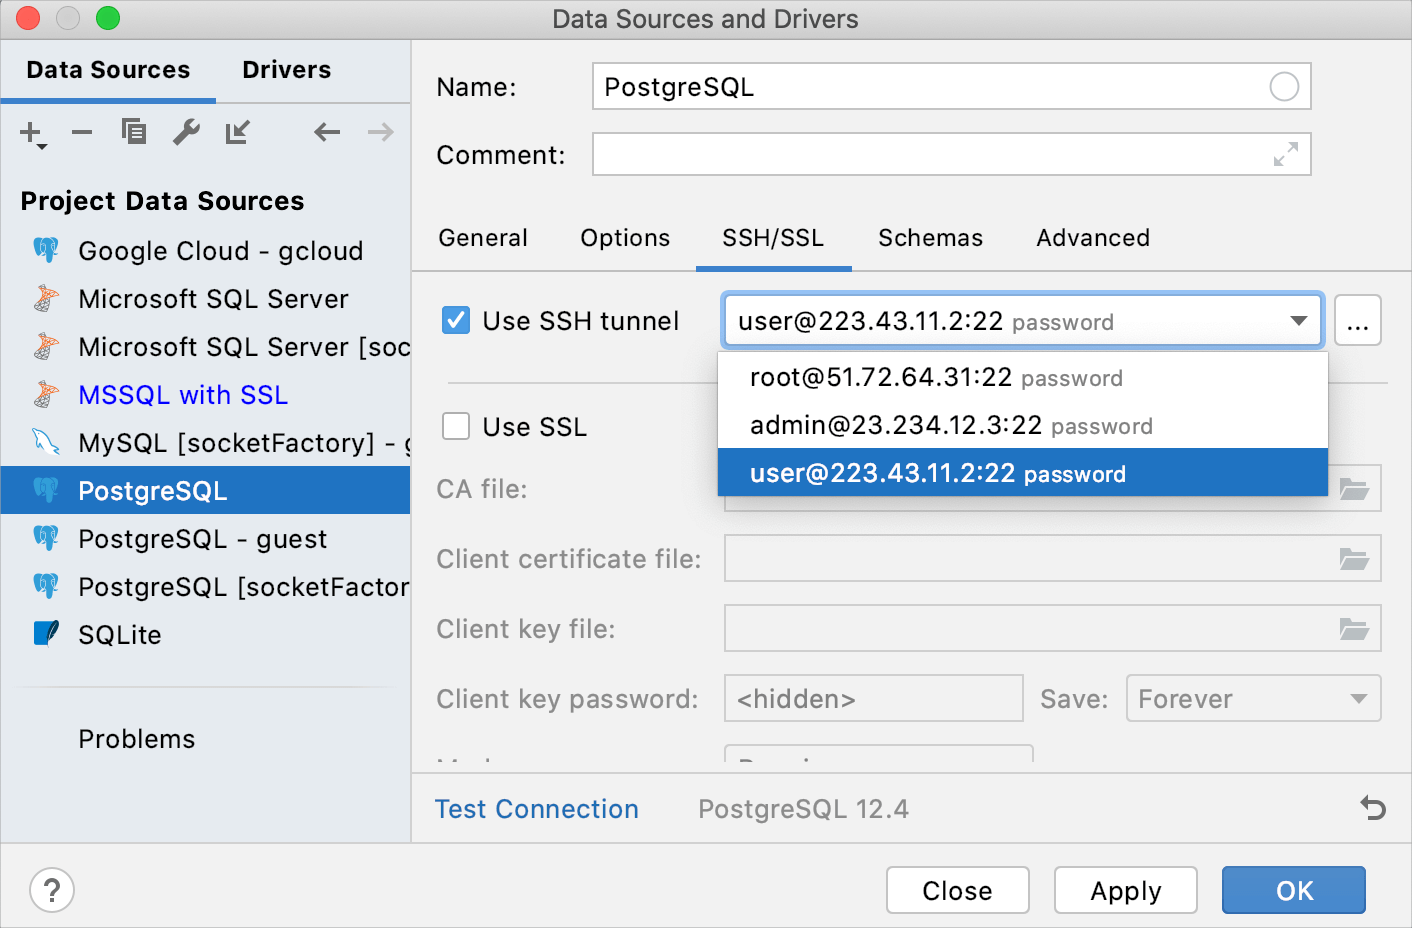
3. Click the SSH/SSL tab and select the Use SSH tunnel checkbox.
4. Click the Add SSH configuration button .
5. In the SSH dialog, click the Add button.
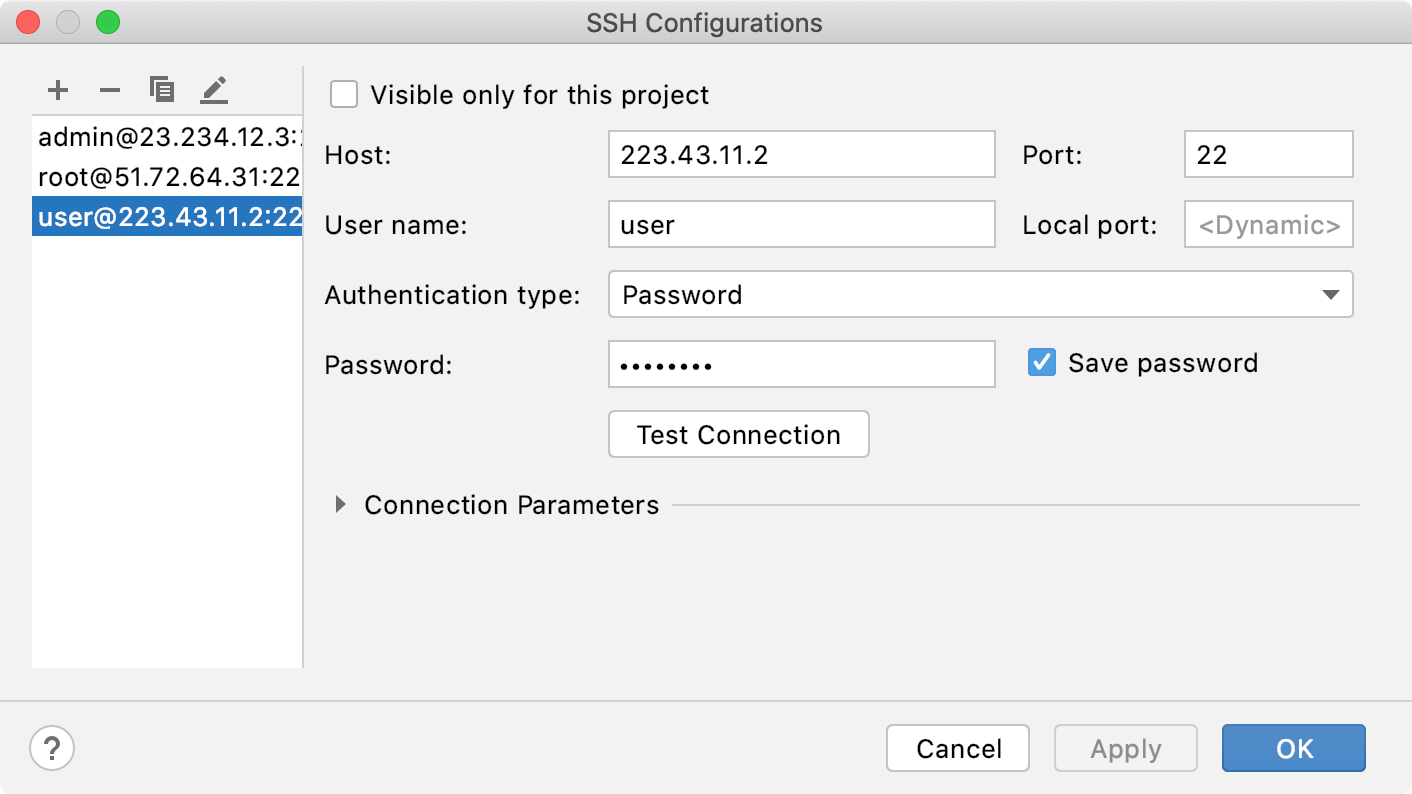
6. If you do not want to share the configuration between projects, select the Visible only for this project checkbox.
7. In Host, Username, and Port fields, specify your connection details.
8. From the Authentication type list, you can select an authentication method:
o Password: to access the host with a password. To save the password in DataGrip, select the Save password checkbox.
o Key pair (OpenSSH or PuTTY): to use SSH authentication with a key pair. To apply this authentication method, you must have a private key on the client machine and a public key on the remote server. DataGrip supports private keys that are generated with the OpenSSH utility.
Specify the path to the file where your private key is stored and type the passphrase (if any) in the corresponding fields. To have DataGrip remember the passphrase, select the Save passphrase checkbox.
o OpenSSH config and authentication agent: to use SSH keys that are managed by a credentials helper application (for example, Pageant on Windows or ssh-agent on macOS and Linux).
Disable SSH connection to a database
1. Open data source properties. You can open data source properties by using one of the following options:
o Navigate to File | Data Sources.
o Press Ctrl+Alt+Shift+S.
o In the Database Explorer (View | Tool Windows | Database Explorer), click the Data Source Properties icon .
2. Select a data source profile where you want to change connection settings.
3. Click the SSH/SSL tab and clear the Use SSH tunnel checkbox.
4. Click Apply.
Create the SSH tunnel with PuTTY (Windows)
1. Download and run the latest version of the PuTTY SSH and Telnet client (download the client from https://www.putty.org/).
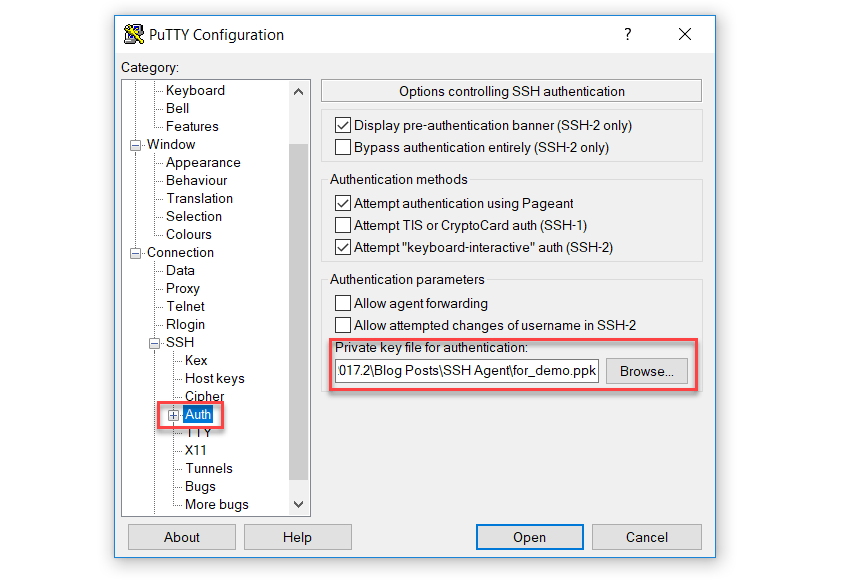
2. In the PuTTY Configuration dialog, navigate to Connection | SSH | Auth.
3. In the Private key file for authentication field, specify the path to your private key file and click Open.
4. In the command line window, specify the username that you use for the SSH tunnel and press Enter. Do not close the command line window.
5. In DataGrip, navigate to File | Data Sources Ctrl+Alt+Shift+S.
6. Select a data source profile where you want to change connection settings.
7. Click the SSH/SSL tab and select the Use SSH tunnel checkbox.
8. From the Auth type list, select OpenSSH config and authentication agent.
9. In Proxy host, Proxy user, and Port fields, specify connection details.
10. To ensure that the connection to the data source is successful, click Test Connection.
Thank You
Mahendran
Helical IT Solutions

Best Open Source Business Intelligence Software Helical Insight is Here