How to set-up an Apache Spark development environment with minimum effort with Docker for Windows
Installing Spark on Windows is an extremely complicated. Several dependencies need to be installed (Java SDK, Python, Winutils, Log4j), services need to be configured, and environment variables need to be properly set. Given that, I decided to use Docker as the first option for all my development environments.
Why do we use Docker?
1. There is no need to install any library or application on Windows, only Docker. No need to ask Technical Support for permission to install software and libraries every week.
2. Windows will always run at maximum potential (without having countless services starting on login)
3. Have different environments for projects, including software versions. Ex: a project can use Apache Spark 2 with Scala and another Apache Spark 3 project with pyspark without any conflict.
4. There are several ready-made images made by the community (spark, jupyter, etc.), making the development set-up much faster.
5. Since docker is built on containerization technology, it’s both scalable and flexible. Each container has its own set of configurations and dependencies packed inside it, which makes it easier to run multiple instances of the same containers simultaneously.
These are just some of the advantages of Docker, there are others which you can read more about on the Docker official page.
Let’s set up our Apache Spark environment.
Install Docker on Windows
You can follow the start guide to download Docker for Windows and go for instructions to install Docker on your machine. If your Windows is the Home Edition, you can follow Install Docker Desktop on Windows Home instructions. When the installation finishes you can restart your machine
If you run any error at this point or later, check Microsoft Troubleshoot guide.
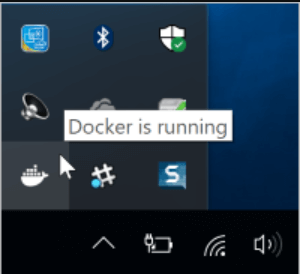
You can start Docker from the start menu, after a while you will see whale docker icon on the system tray:

whale docker icon
you can right-click on the icon and select Dashboard. On the dashboard, you can click on the configurations button (engine icon on the top right). You will see this screen:

Docker Dashboard
One thing I like to do is unselect the option:
Start docker desktop on your login.
This way docker will not start with windows and I can start it only when I need by the start menu.
Check Docker Installation
First of all, we need to ensure that our docker installation is working properly. Open Windows Terminal, a Windows (Unix-like) terminal thathas a lot of features that help us as developers (tabs, auto-complete, themes, and other cool features) and type the following:
~$ docker run hello-world
If you see something like this:

Docker hello-world
Your docker installation is ok.
Jupyter and Apache Spark
As I said earlier, one of the coolest features of docker relies on the community images. There’s a lot of pre-made images for almost all needs available to download and use with minimum or no configuration. Take some time to explore the Docker Hub, and see by yourself.
The Jupyter developers have been doing an amazing job actively maintaining some images for Data Scientists and Researchers, the project page can be found here. Some of the images are:
1. jupyter/r-notebook includes popular packages from the R ecosystem.
2. jupyter/scipy-notebook includes popular packages from the scientific Python ecosystem.
3. jupyter/tensorflow-notebook includes popular Python deep learning libraries.
4. jupyter/pyspark-notebook includes Python support for Apache Spark.
5. jupyter/all-spark-notebook includes Python, R, and Scala support for Apache Spark.
For our Apache Spark environment, we choose the jupyter/pyspark-notebook.
To create a new container, you can go to a terminal and type the following:
~$ docker run -p 8888:8888 -e JUPYTER_ENABLE_LAB=yes --name pysparkjupyter/pyspark-notebook
This command pulls the jupyter/pyspark-notebook image from Docker Hub if it is not already present on the localhost.It then starts a container with name=pyspark running a Jupyter Notebook server and exposes the server on host port 8888.
The server logs appear in the terminal and include a URL to the notebook server. You can navigate to the URL, create a new python notebook.
Now, we have our Apache Spark environment with minimum effort. You can open a terminal and install packages using conda or pip and manage your packages and dependencies as you wish. Once you have finished you can press ctrl+C and stop the container.
Data Persistence
If you want to start your container and have your data persisted you cannot run the “docker run” command again, this will create a new default container, so what we need to do?
You can type in a terminal:
~$ docker ps -a
this will list all containers available.

Docker container list
To start the same container that you create previously, type:
~$ docker start -a pyspark
where -a is a flag that tells docker to bind the console output to the terminal and pyspark is the name of the container. To learn more about docker start options you can visit Docker docs.
Thank You
Prashanth Kanna
Helical IT Solutions

Best Open Source Business Intelligence Software Helical Insight is Here
