Snowflake also provides a free trial account which lasts for 30 days and you will get a $400 of free usage credits.
You can sign up for a free trial using the snowflake website.
Steps to create Snowflake Free Trial Account
STEP-1:
Fill the self service form on Snowflake Website
i)First login to the snowflake website i.e;https://signup.snowflake.com/
It will navigate to below page

Snowflake Sign up page
ii)Enter the below details in snowflake Sign Up page form
a)First name
b)Last name
c)Valid Email Adress
d)Company
Note: If you are not working or do not want to share the information of the company can select any random name for Ex:’NoCompany’
e)Select location(By default it is selected).
f)Select any role from the dropdown
It will green tick at the text box after entering the details
Then click on Continue.
Step-2:
Select Snowflake Edition, Platform and Region
After entering all the details in the sign up page ,it will navigate to the below page

Choose Snowflake Edition, Platform &Region
Choose your Snowflake Edition. It includes the following:
- Standard Edition
- Enterprise Edition
- Business Critical
Choose Cloud Provider from the following:
- Microsoft Azure
- Amazon Web Service
- Google Cloud Platform
Snowflake cloud do not operate without an underlying cloud provider infrastructure.
Deployment Region:
After selecting the cloud provider it will set Deployment regions. Choice of regions is different depending on cloud Provider.
- Select Check box i.e; you have read and agree to the terms of the snowflake self service on Demand Terms.
After Completing the Step-2,it will ask few of the optional questions like
1.Why are you signing for a trail?
You can click on skip option if you want to ignore orelse select any options from the above question then click on next. It will ask the next optional below question.
2.What will you use snowflake for?
You can click on skip option if you want to ignore orelse select any options from the above question then click on next. It will ask the next optional below question
3.Select your prefered language(s) to work in
You can click on skip option if you want to ignore orelse select any options from the above question then click on next.
Step-3:
Activate your Account
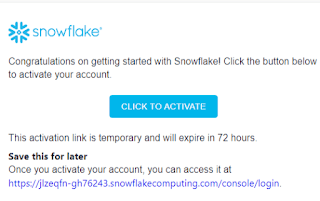
You will receive an email which was provided in sign up page regarding to “activate your account”.
Open the email and click on Click TO Activate.

Account activation
Step-4:
Create Username and Password
After completion of activation of account, need to create Username and password and click on Get Started. Now the Snowflake free trial account is activated

Trial Account is activated
This Credentials helps every time to access snowflake account.
Once the Trial is Over, the account can be converted to a paid account by adding credit card details.
Thank You
Nikhila Bejjala
Helical IT Solutions

Best Open Source Business Intelligence Software Helical Insight is Here
